2/27/25

Pretty Pink Posh 11th Birthday Blog Hop

Welcome to Day 4 of the Pretty Pink Posh 11th Birthday Blog Hop! I am so happy to be joining in the celebration! Be sure to leave a comment along the hop for a chance to with a $30 gift certificate! I have two projects to share with you so let's get started. The New Release is full of fun birthday products! 


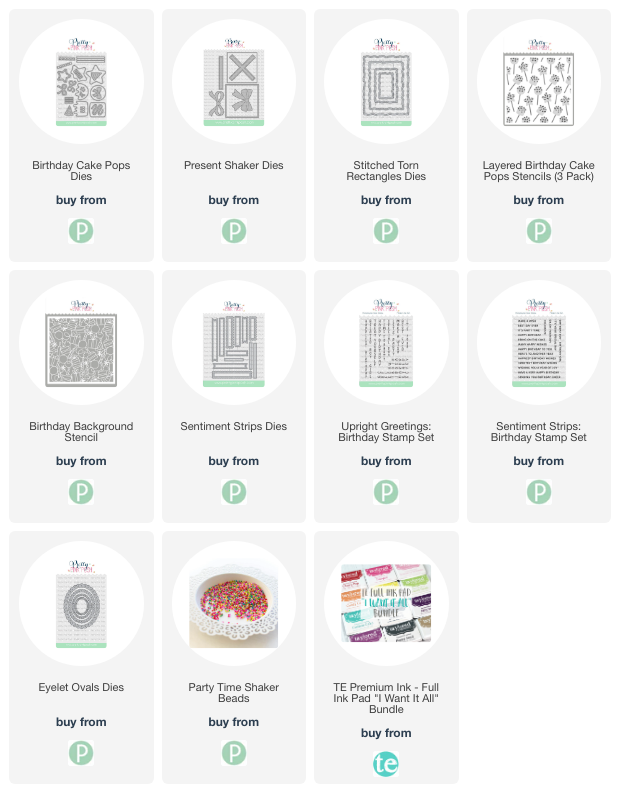
My first card features the adorable Birthday Cake Pops Dies. The die set included so many options to create different cake pops. I added extra details using Glossy Accents and Stickles. 

The sentiment is from the Sentiment Strips: Birthday Stamp Set and die cut with the Sentiment Strips Dies. I have linked the products I used below. 


The background is stenciled with the new Layered Birthday Cake Pops Stencils. This is a set of three stencils. 

I die cut the card front with the Stitched Torn Rectangles Dies.


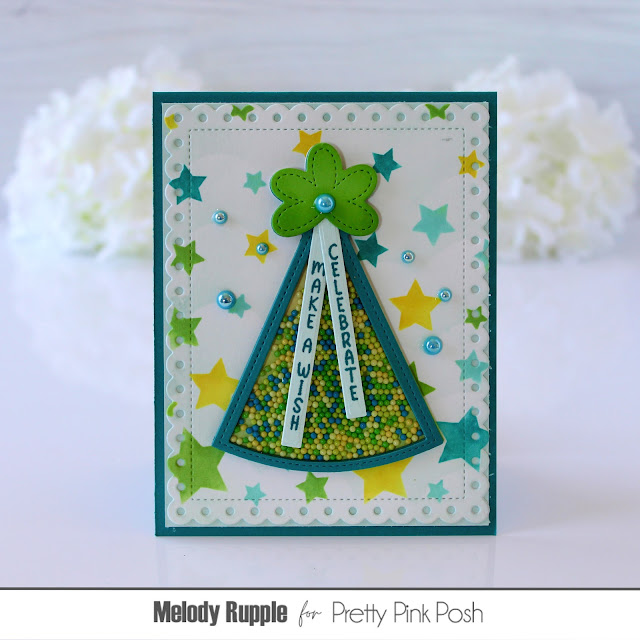
Next up is a look at the Present Shaker Dies. Like the Party Hat I shared yesterday the Present Shaker dies can also to used for non shaker cards. 

I die cut the frame of the present five times and glued the layers together adding die cut acetate under the first layer. Next I dropped in the seed beads from the new Party TimeShaker Beads and then added the back layer. Then I added the glittered die cut bow and ribbon.

The sentiment are from the new Upright Greetings: Birthday Stamp Set. I attached the sentiments to the acetate and then added the bow on top. The sentiment at the bottom is from the Sentiment Strips: Birthday Stamp Set.


The backgrounds is stenciled with the Birthday Background Stencil and I die cut the card front with the Torn Edges Rectangle Dies. 


PRIZES: be sure to leave comments on each stop. We are giving away 4 $30 gift certificates to random comments (1 winner each day) left before March 3, 2025 at 11:59 PM PST. We’ll be announcing the winners on the PPP blog, so be sure to return and see if you are one of the winners and/ or sign up for PPP blog posts to your email!

Here's the complete list of designers for todays hop!


Hope you have enjoyed a look at the new Release!

2/26/25

Happy 11th Birthday Pretty Pink Posh!

Today I am excited and happy to be.joining in the 11th Birthday Celebration at Pretty Pink Posh! I have loved designing for PPP for many years and love working with Paulina. The New Release is full of fun birthday products! 


My first project I will be sharing is created the new Party Hat Shaker Dies. The die makes a great focal point to a card and can be used as a shaker or a non shaker card. 

I die cut the frame of the hat five times and glued the layers together adding die cut acetate under the first layer. Next I dropped in the seed beads from the new Birthday Wish Shaker Beads and then added the back layer. 


The background is stenciled with the new Cascading Stars Stencil. I have listed the inks I used below. The sentiments are from the new Upright Greetings: Birthday Stamp Set. I attached the sentiments to the acetate and then added the pom pom on top. 


The card front is die cut with the Eyelet Rectangles Dies and I finished of with a few Pacific Blue Pearls. 


Thanks for stopping! Stop by the PPP Blog for more inspiration and details! I will be back tomorrow with more projects.

2/25/25

Talking In Circles

 Hi! I have such a fun new cardmaking kit from Taylored Expressions to share with you today. Meet Talking In Circles! The kit features dies and page maps to create cards in unique circular patterns. The Talking In Circles Cardmakin Kit is available now in the TE Store


My first card features one of the Talking in Circles - Mini Slim Toffee Page Maps. I wanted to give the card a more masculine take. I never have enough masculine birthday cards in my stash and I think this kit perfect for male cards. 


I used the Talking in Circles Die - Half and the Talking in Circles Die - Quarter Dies, that are included in the kit, to die cut my pieces from Rock Candy, Peapod, Blueberry, Licorice, and Champagne Glittered Cardstock. Then I just glued the die cut pieces to the pattern printed on the Toffee Cardstock. 


I added the sentiment with the Sentiment Staples Stamp Set and coordinating dies. I stamped the sentiment in Versamark Ink and embossed with Champagne Embossing Powder. 


I die cut the Toffee Mini Slim Map with the Stitched Mini Slim Stacks and matted with panel with Rock Candy Cardstock. 


On my second card  I used one of the Talking in Circles - A2 Sugar Cube Maps. I used the Talking in Circles Die - Quarter to cut all the pieces. I chose to work with Cupcake, Fruit Punch, Lavender Glaze, Jelly Donut, Confetti Cake, Blue Raspberry, Granny Smith, and Potato Chip Cardstock. 


Once you die cut the pieces you simply glue them to the pattern. There are whole, half, and quarter circle dies in the kit. 


The sentiments are from the Big Hello Stamp Set and die cut the the Big Hello Dies. I used Blue Raspberry and Confetti Cake Inks to stamp Hey. I added a few enamel dots in Jelly Donut, Cookie Monster, Peapod. 


I die cut the Page Map with the Petite Scallop Rectangle Stacklets. 

  • Talking in Circles Die - Whole
  • Talking in Circles Die - Half
  • Talking in Circles Die - Quarter
  • TE Maps - Talking in Circles - A2 Sugar Cube
  • TE Maps - Talking in Circles - Mini Slim Sugar Cube
  • The Insiders - Talking in Circles
  • Taylored Tutorial
Kits go fast and most items are not available to purchase outside the kit. New to the kits this year, we’re including a Taylored Tutorial instruction sheet, which provides a step-by-step guide for creating a special project using the kit's contents.

Available outside the kit includes:


We also have our Full Circle Bundle which includes the kit along with each of the additional coordinating products for one of everything.

Thanks for stopping by! Stop by the TE Blog for all the details and more inspiration. 


2/20/25

Wild Blooms Birthday

Hi and thanks for stopping by! It has been busy at my house and I haven't spent much time in my craft room. But I needed a birthday card so I spent some time making a card last night. A stencil is alway a good choice when you are short on time! 


I decided on the Wild Blooms Stencil from Papertrey Ink. This is a set of 6 stencils that create this beautiful background for your card. You do not need to added much else. 


I stenciled in the PTI inks I have listed below. I also blended New Leaf Ink at the bottom of the card and Speckled Egg Distress Ink at the top of card. Then I splattered the background with white paint. 


To add a little more texture I die cut flowers and leaves with the Into the Blooms: Clover Die. I die cut from Stamper's Select White Cardstock and the blended Pure Poppy Ink on the flowers and New Leaf and Pinefeather on the leaves. 


The sentiment is from the Birthday Your Way II Stamp Set and die cut with the coordinating dies. I added a strip of vellum and then glued the sentiment to the vellum. I added yellow gems to the center of the flowers. 

Supplies:

Stamps: Birthday Your Way II

Dies: Birthday Your Way II, Into the Blooms: Clover Die, Love to Layer: Torn Edges

Ink: Pure Poppy, Scarlet Jewel, Lemon Tart, Mint Julep, New Leaf, Pinefeather, Tropical Teal

Paper: Stamper's Select White, Pure Poppy, Vellum

Other: Wild Blooms Stencil, White Paint, Yellow Gems, Speckled Egg Distress Ink

Have a great day! 

2/11/25

Irish Blessings

It's the St. Paddy's Day Release at Taylored Expressions! It has been a few years since TE has added new St. Patrick's Day products to the lineup and the new items are so fun!  All the products are available now in the TE Store.


I have two projects to share with you today that feature a number of the new products. Pretty rainbows and lucky charms!! 


My first project features the new Perfect Pennant Dies, the Foil It - Perfect Pennant St. Paddy's Day Panels. and Perfect Pennant St. Paddy's Day Stamp Set and coordinating dies, and the fun Happy Go Lucky Layering Stencil. 


I think you could used the Perfect Pennant Dies throughout the year on other projects. Using a couple of the pennants in the Foil It - Perfect Pennants St. Paddy's Day I foiled the pennants with one of the new foil colors being released, Magical. The shamrocks and horseshoe in included in the Perfect Pennant St. Paddy's Day Stamp Set. 


The background is stenciled with the new Happy Go Lucky Layering Stencil. This is a set of four stencils. I have listed the inks I used below. I die cut the stenciled panel with the Squiggle Stacklets. I also used the Squiggle Stacklets to die the vellum panel. 


Next up is a look at the Rainbow of Possibilities Stencil and the Another Irish Blessing Stamp. To create the background I first lightly stenciled clouds in the background with the Set the Scene - Clouds Stencil Strips with Salt Water Taffy Ink on Sugar Cube Cardstock. Then I stenciled the rainbow over the clouds. The Rain of Possibilities Stencil is a set of two stencils. 


Next I stamped the sentiment with VersaFine Clair - Nocturne Ink. I used the Perfect Pennant St. Paddy's Day Stamp Set and Dies to add the shamrocks and lucky horseshoe. 


I used the Squiggle Stacklets to die cut the card front.  I used Gold Glitter Cardstock and Gold Glitter Drops to add some sparkle. 


We have two bundles:

  • Happy Go Lucky Bundle:
    • Happy Go Lucky Layering Stencil
    • Happy Go Lucky Cutting Plate Die
    • My Lucky Charm Stamp & Die Combo
  • Perfect Pennant Bundle
    • Perfect Pennant Die Set
    • Perfect Pennant - St. Paddy’s Day Clear Stamp Set
    • Perfect Pennant - St. Paddy’s Day Dies
Plus, get free rainbow stickers with any order of $25 or more from the St. Patrick’s Day category!

Thanks for stopping by! Visit the TE Blog for all the details, videos, and more inspiration from the team.


2/4/25

New Gumdrop Ink and Cardstock

Hi Friends! Taylored Expressions is adding a new color of ink and cardstock to the TE catalog today, Gumdrop! I have a few projects to share with you that will give a good look at the new color which is available now in the TE Store


I have really been trying to experiment with some new color combos. I can get in such a rut! I am happy with how this one turned out. I used the new Gumdrop Ink with Confetti Cake, Blueberry, Potato Chip, Macaron, and Dill Pickle Inks. 


I used the Fan Favorite Layering Stencil for this card. This set of 6 stencils that layer together to create colorful paper fans. To the middle of the fans I added TE Enamel Dots in Dried Fig and Cookie Monster. 


Once I had stenciled the background I embossed with the Fan Favorite 3D Embossing Folder. The embossing highlights the design and adds texture and depth. 


The sentiment is from the Fantastic Birthday Stamp Set and die cut with the coordinating Dies. I stamped the sentiment in the new Gumdrop Ink. 

My next project features the new Gumdrop Cardstock. I created a set of tags with the Monster Squad Die Set.  I have always loved these dies. So fun for kids birthday presents. I used a combination of Gumdrop, Cupcake, Fruit Punch, Granny Smith, Macaron, Licorice, and TE Gold Glittered Cardstocks. 


I die cut the tags with Tag Stacklets 2 and the Pierced Tag Stacklets 2 Dies. I splattered gold paint on the backgrounds of each tag. I used dies in the Gnome Alone - Birthday Dies to add the balloons and cupcake.  


All the sentiments are from the Fantastic Birthday Stamp Set and die cut with the  Fantastic Birthday Stamp Dies. I used Oreo Enamel Dots for the eyes of my monsters. 


Gumdrop is available in inks, cardstock and envelopes! We also have an I Want it All Bundle for an easy one click to add everything to your cart.

Thanks for stopping by! Visit the TE Blog for all the details, videos, and more inspiration from the team.