8/31/21

The new Fall Release at Taylored Expressions

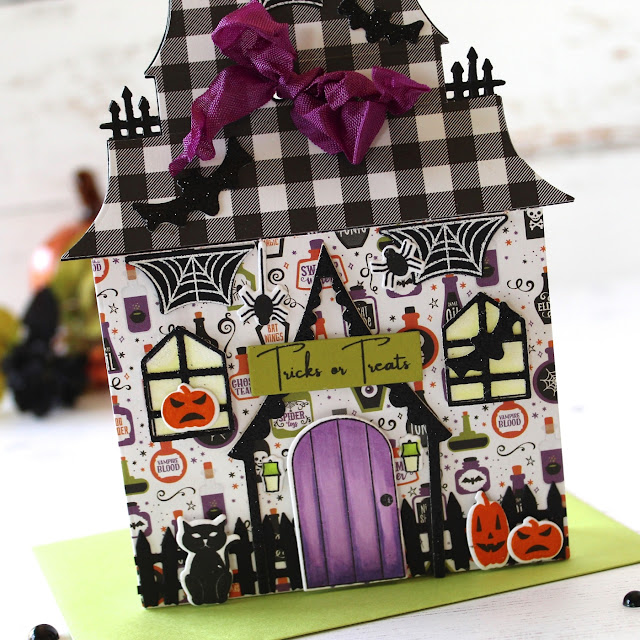
Hi! Today Taylored Expressions is releasing the TE Fall Release! Fall is definitely my favorite time of year. I love the transition to boots and sweaters and crafting with the warm colors of fall. All the new products are available now in the TE Store


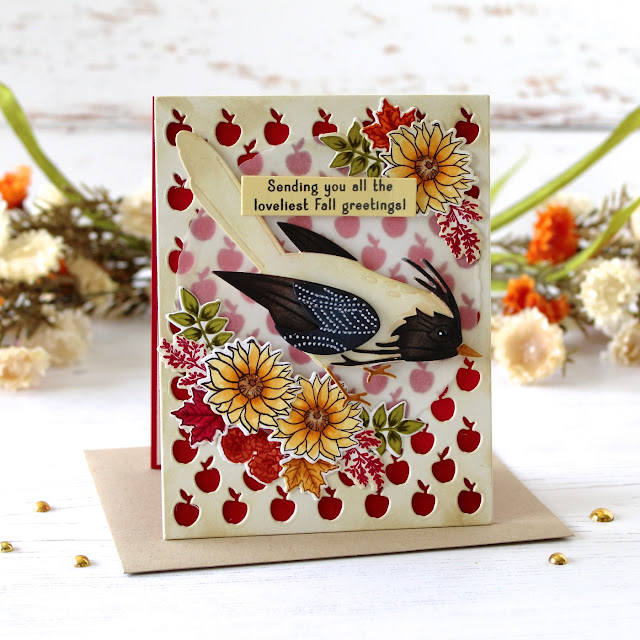
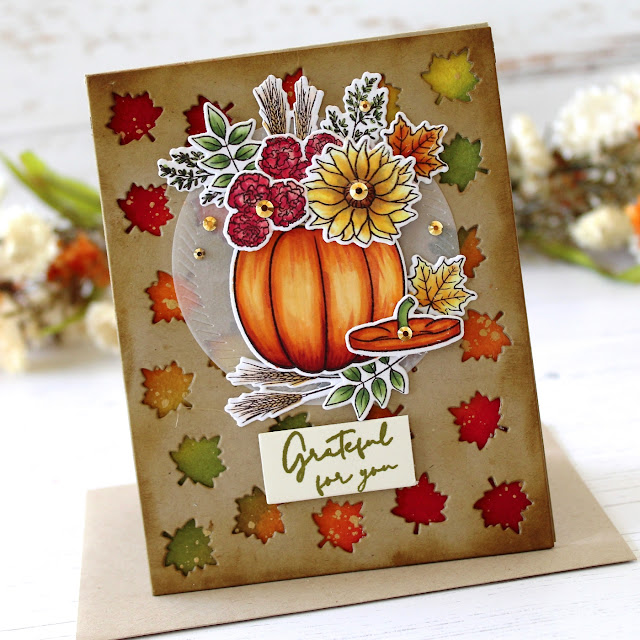
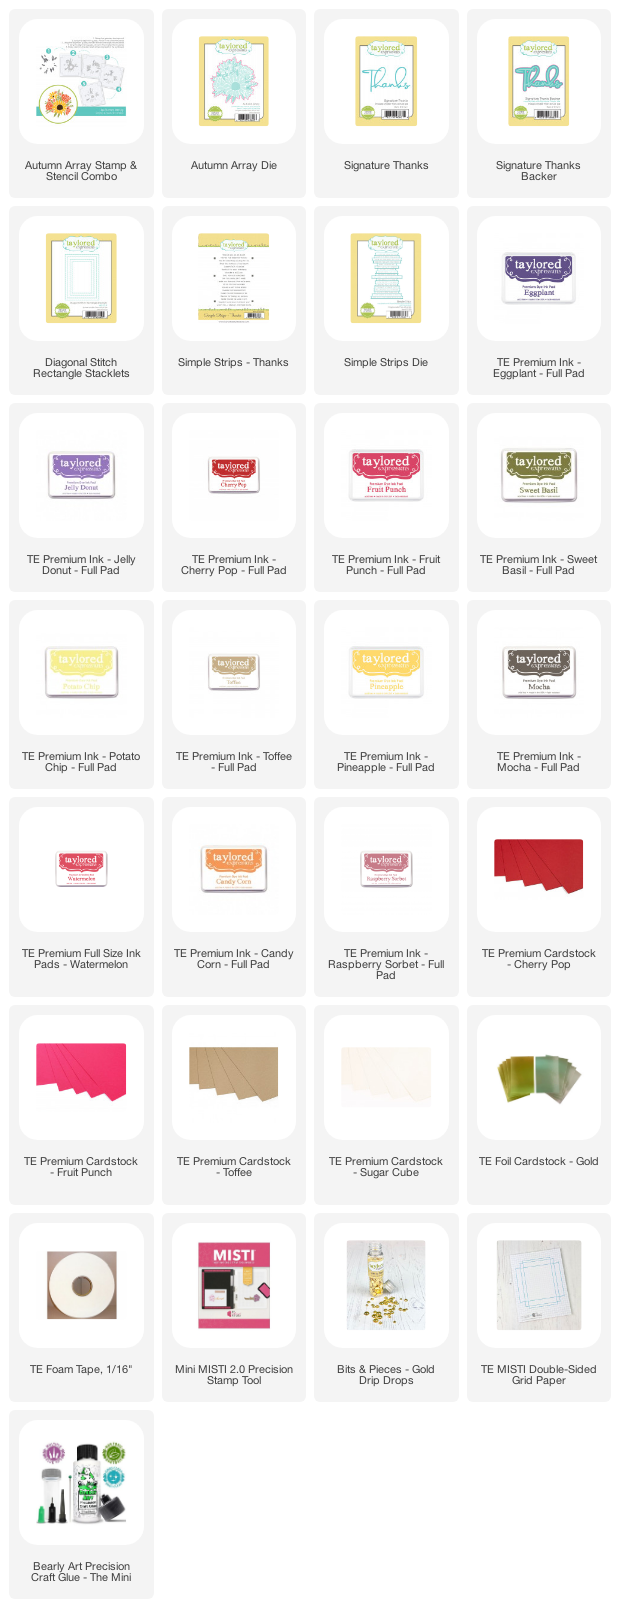
My first card features the new Autumn Array Stamp and Stencil Combo. You ink up the stamp to create the all the leaves and then use the four stencils to add the beautiful fall flowers. 


TE Bitty Blenders are prefect for this project and it is easy to add shading with two different colors of inks. For instance on the red roses I used Watermelon Ink to stencil the flower and then went back with Cherry Pop Ink to add the shading. I used Potato Chip and Pineapple Ink for the sunflowers and Toffee and Mocha Ink for the centers of the flowers. The smaller flowers are done in Candy Corn and Pumpkin Inks. 


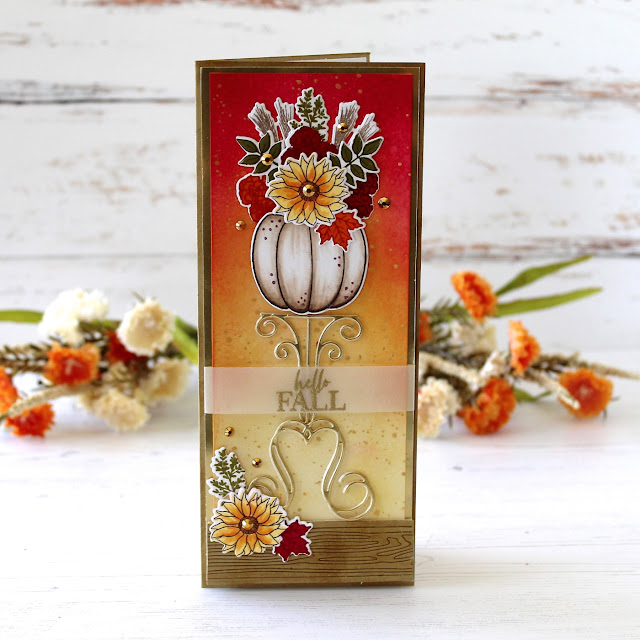
The Signature Thanks and the Signature Thanks Backer Dies are also included in this release. I cut the signature from TE Gold Foil and the backing from Cherry Pop Cardstock. The smaller sentiment is from the previously released Simple Strips - Thanks. 


On my second card I changed up my colors just a little bit. The roses are done in Raspberry Sorbet and Fruit Punch Inks and the smaller flowers in Jelly Donut and Eggplant. 


The card front on each of my cards is a panel of Sugar Cube Cardstock with detailing around the edges done with the Diagonal Stitch Rectangle Stacklets. I lightly blended Potato Chip and Toffee Ink around the edges and splattered gold paint. 


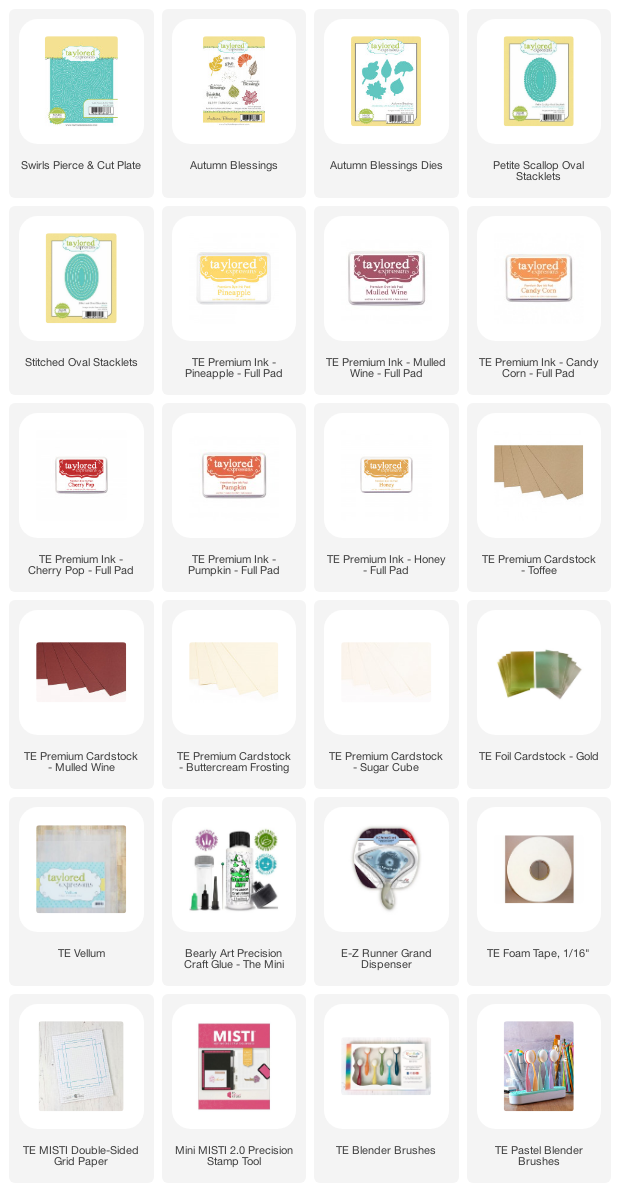
Next up is a look at the new Swirls Pierce and Cut Plate. I die cut the plate from Sugar Cube Cardstock and blended Mulled Wine, Cherry Pop, Pumpkin, Candy Corn, Honey, and Pineapple Ink. I started with the darkest ink at the bottom and worked my way up to the lightest. 


The sentiment and leaves is from the new Autumn Blessings Stamp Set and die cut with the coordinating Autumn Blessings Dies. I used the Stitched Oval Stacklets and the Petite Scallop Oval Stacklets to center the sentiment on the card. 


Free envelopes & seals:
With any purchase of Fall products (old and new!) of $75 or more, you will receive a FREE pack of envelopes and custom Autumn Blessings envelope seals. The pack includes 10 envelopes (2 each of Mulled Wine, Pumpkin, Dijon, Sweet Basil and Toffee) and 10 exclusive envelope seals (these seals are not available to purchase). This offer is valid now through 11:59PM Central Time Sunday, September 5th, or while supplies last.


Free class:
When you purchase the Autumn Blessings Collection (Autumn Blessings stamp set, Autumn Blessings die collection, and Swirls Pierce & Cut Plate die) through Sunday, September 5th, you will get a free exclusive 2-card video craft along class with Taylor!

This mini version of our Online Crafty Classes is a great way for you to put your new Fall goodies to use right away making two different cards at your own pace! Watch the videos as often as you like and learn some new cardmaking tips and tricks while discovering inspiration for more designs!

Once you complete your purchase, you will receive an email (separate from your order confirmation email) with links to the class videos on YouTube.

Although Taylor will recommend colors for ink and cardstock, you can use anything you have to make these projects uniquely yours!

Hurry! This offer is only valid through 11:59 pm (CT) on Sunday, September 5th, or while supplies last.

Thanks so much for stopping by today! You can stop by the TE Blog for all the details and more inspiration.


8/25/21

Trim a Tree with Spellbinders


Hi and thanks for stopping by today!  I have two projects to share with you that I created with the new Spellbinders Trim A Tree Collection. The collection included a Layered Christmas Tree StencilO Christmas Tree Etched Dies, and the Shining Christmas Tree Glimmer Hot Foil Plate & Die Set. 


To create the background I cut a piece of dark blue cardstock to fit the card front and blended Chipped Sapphire Distress Ink on the outside edges. Then I  used the Layered Christmas Tree Stencil with Journey Modeling Paste to add the snow to the background. 


Next I created the other elements to create the scene. I die cut the snow for the tree, added a little Journey Modeling Paste to the edges, and sprinkled the paste with glitter. I used the Shining Christmas Tree Glimmer Hot Foil Plate & Die Set, with Gold Glimmer Foil, to create the sentiments. The star and ornaments are die cut from Mirror Gold Cardstock


Here's a closer look at the finished project. I used foam tape to attach the tree to the card front to just add a little dimension.


S3-419, GLP-219, STN-003, JM-0073, GLF-014, SCS-118
Other: Tim Holtz Distress Ink in Chipped Sapphire and Rustic Wilderness,  Scotch Foam Mounting Tape, Bearly Art Craft Glue, Taylored Expressions Blender Brushes

Here is my second card I created with all the same products. On this card I used the stencil and dark green ink to add the detail to the tree. I cut a piece of white cardstock to fit the card front and the die cut an oval directly into the card front. I cut a slightly smaller oval from Mirror Gold Cardstock to use as a mat. 


I used the Shining Christmas Tree Glimmer Hot Foil Plate & Die Set to add the gold foil  to the tree garland, sentiment, and star. I finished off the card with a few score lines around the edges of the card. 

S3-419, GLP-219, STN-003, JM-0073, GLF-014, SCS-118, S4-110
Other: Tim Holtz Distress Ink in Blueprint Sketch and Chipped Sapphire, Taylored Expression Sweet Basil Ink, Taylored Expression Red Glitter Cardstock, Scotch Foam Mounting Tape

Thanks for taking a look! 

8/24/21

Jan-June TE Exclusives Release

Today Taylored Expressions is releasing some TE Exclusives, products that you could earn free with a qualifying purchase and are now available to everyone! You can find all the new products in the TE Store


Today I am showcasing the Mixed Blooms Layering Stencil and the Little Bits - Mixed Blooms. I  decided to go with a fall theme and used Cherry Pop, Pineapple, and Sweet Basil Ink with the stencil on Toffee Cardstock. The sentiment is from the Handlettered Thanksgiving Stamp Set and die cut with Handlettered Thanksgiving Dies. In stamped in Versamark Ink on Cherry Pop Cardstock and embossed with TE Gold Embossing Powder. 


I added the sentiment to circles die cut with the Stitched Circle Stacklets and the Petite Scallop Circle Stacklets. The flowers are cut from felt in Cranberry and Carrot. I used Avocado and Moss for the leaves. I added Bits and Pieces - Gold Drip Dots to the center of the flowers. 

Now, through Sunday, August 29th, save 30% on our select summer favorites! If you have had your eye on some of these stamp sets, die, and stencils, now is the time to add them to your collection and save at the same time!


Stop by the TE Blog for more inspiration!

8/23/21

Fall Greetings

I am up on the Papertrey Ink Blog today with the latest What Do I do With This? Challenge. For this challenge our designers will get to try out some new tools and share the projects they created using them.  Stop by the PTI Blog to see how you can play along. 


Today I am working with clear Rain Stones and adding color to the stones with Copic Markers. Other alcohol based markers will also work. On my card I used the stones to add to the centers to the flowers. I colored the stones in the center of the sunflowers in E59, a dark brown and for the smaller flowers I used R89, a dark red.


I used the Fall Bouquet Stamps and Dies to create the pumpkin and the flowers and foliage. I am really enjoying working with the colors of fall. I chose Classic Kraft, Ripe Avocado, Scarlet Jewel cardstock to work with and added a sentiment from the Inside Greetings: Fall Mini Stamp Set.


The pumpkin and foliage are layered on a circle of vellum, die cut with the Love to Layer: Scalloped Circle Die, then a circle of Ripe Avocado Cardstock, then a rectangle die cut with the Border Bling: Skinny Stitched Frames Die. The card front is die cut with the Border Bing: Tin Stitch Die.

Hope you get a chance to play along with the challenge. You can find all the details HERE

8/17/21

The new In the Abstract Cardmaking Kit from Taylored Expressions

Today Taylored Expression is releasing a new card kit, In the Abstract. The mix of stencils and stamps make creating these cards so easy and will get you thinking out outside of box! The kit is available now in the TE Store


I created three cards with the kit. 


This card uses a blend of Avocado, Sprinkles, and Gumball Inks along with the stencils in the kit. I layered the stencils one on top of each other so you can see how the colors blend. I stamped the circle spiral in Blueberry Ink and the splattered gold paint on the background of the card. 


I die cut the Subtle Sprigs die collection from Ripe Avocado Cardstock and added the die cut over the background. The sentiments I have used on my cards are also in the kit. 


On my second card I used the stencils to create abstract fruit. The lemon is a blend of Potato Chip and Pineapple inks. The Pear is blend of Lime Zest and Peapod, and the peach. is created with Potato Chip, Candy. Corn, and Guava Inks. The stems are done in Avocado Ink. 


I stamped the dots in Versamark Ink and embossed with TE Gold Embossing Powder. I added Bits & Pieces Gold Drip Dots to finish off the card. I had the Gold Drip Dots in my stash but the kit includes Bits & Pieces – Black Rhinestones.


I wanted my last card to feel serene to go with the Just Breathe sentiment. I used Sea Salt Cardstock for the background. With the stencils I used a combination of Earl Grey, Gumball, and Avocado Inks. 


This card used the Branch Out die collection, which is an add-on item. I stamped the stripes in Oreo Ink. I added a few Bits &. Pieces Black Drip Dots to. the card. The card front is die cut with the Stitched Rectangle Stacklets and the Petite Scallop Rectangle Stacklets. 


Here’s everything included in the In the Abstract Kit – which is available for $72:

  • Abstract Accents Stencil & Clear Stamp Combo set
  • Bitty Blender Brushes – set of 2
  • Subtle Sprigs die collection
  • Clearly Crafty Beautiful Soul stamp set
  • Bits & Pieces – Black Rhinestones
  • 6 A2 Envelopes: 1 each of Toffee, Poppy Seed, Sweet Basil, Avocado, Salt Water Taffy, and Oreo
  • Packaged in a zippered pouch with a custom kit label

Limited quantity available. Most items are not available to purchase individually.


Kit add-ons available to purchase separately: additional envelope seals (set of 10) and the Branch Out die collection.


Stop by the TE Blog for all the details and more inspiration from the design team. 

8/14/21

Papertrey Ink August Release Sneak Peeks Day 4

Hi and welcome to Day 4 of sneak peeks at the Papertrey Ink August Release. Today I have a pretty fall card and a really cute Halloween Kit to share with you. Everything will be available for purchase beginning at 10 PM EDT on August 15th!  

I love the colors of Fall! This card features the new Cover Plate: Apples Die and the Feather Friends 14 Die. I cut the cover plate from white cardstock and then inked the edges with Antique Linen Distress Ink. Behind the apple cutouts I added a piece of cardstock blended with Pure Poppy and Scarlet Jewels Ink. 


I die cut all the parts for the bird from white cardstock and used distress inks add the color.  I used a white gel pen to add the details to the bird's wing.  I center the bird on a circle of vellum die  cut with the Love to Layer: Scalloped Circle Die. Then I stamped the flowers and leaves with the new Pumpkin Bouquet Stamp Set and coordinating dies and arranged them around the circle. The sentiment is from the new Inside Greetings: Fall stamps. 


My next project is created with the new Spooktacular Kit. It is the cutest!! There are three different size mason jar dies, cute tags, spooky accessories, ribbons, sequins, sentiments, twine and google eyes! 


To create my card I used the largest mason jar die cut. I cut the jar from white cardstock and wrapped white ribbon around the jar to create the mummy. I die cut the  lid from gold. foil. The sentiment is part of the Spooktacular Halloween Kit Stamp Set. 


I also created a tag using the smallest mason jar die and the Spooktacular Faces Dies. The tags is die cut with the Charming Tags 1 Die.

Thanks for taking a look!  Stop by the Papertrey Blog for more more inspiration with the new products.

8/13/21

Papertrey. Ink August Sneak Peeks Day 2 - Hey Boo!

Hi and welcome to Day 3 of sneak peeks at the Papertrey Ink August Release. Today I have a Halloween Project and a Christmas project to share with you. Everything will be available for purchase beginning at 10 PM EDT on August 15th! 


First up is a look at the Pumpkin Party Stamp Set and Dies and the To Die For Sentiments: Hey Boo. I cut the sentiment from black glittered card stock. I die cut twice and layered the two die cuts on top of each other. I like the added dimension this adds to the card. 


Next I stamped a number of the pumpkins from the new Pumpkin Party Stamp Set. I colored the Jack-o-lanterns with Copic Markers and then die cut faces in the pumpkins. Then I stamped the patterns in a mix  of black and gold embossing. 

I stenciled clouds in the background and spattered gold paint. 


My next card features the new Scene Everywhere: Winter Stamps and Dies and the From Our House to Yours Stamp Set and Dies. I just love house stamps and this set creates such cute. houses. I stamped the frame with Pure Poppy Ink on Classic Kraft Cardstock with the Scene Everywhere Winter Stamps and Dies along with the tall green trees in the background and the hills of snow. 


The house and the bare trees are created with the From Our House. to Yours Stamp Set and Dies along with the sentiment at the bottom. I added glitter to the top of the house and the bare trees. Make such a cute scene!  

Thanks for taking a look! I will be back tomorrow for Day 4 of sneak peeks. Stop by the Papertrey Blog for more more inspiration with the new products.

8/12/21

Papertrey Ink August Release Sneak Peeks Day 2

Hi and welcome to Day 2 of sneak peeks at the Papertrey Ink August Release. Today I have two fun Halloween Projects to share with you. Everything will be available for purchase beginning at 10 PM EDT on August 15th!


My first card is created with the Storybook Halloween Stamp Set and dies. This set is latest addition to the Storybook Series. The Storybook Christmas Dies will die cut the books and the stamps in the Storybook Christmas Stamp Set stamp the background of each book. Then there are mini stamps for different holidays. 


The background of my card is die cut with the new Cover Plate: Pumpkin Die. The Halloween Dies cut the spiderwebs, pumpkin, spiders. 


My second project features the Haunted House Stamp Set and dies. You can make a cute treat holder or a card with this set. To create the treat holder I used the previously released Tent Style Packaging: Holiday House Die along with the Haunted House Stamps and Dies.


I love the details on the roof! I added a few black glittered bats and some spider webs. The die that cut the roof also cut two holes that you can used to string ribbon through and hold the box together. 


The details are easy to add with the stamps and dies. The sentiment is included in the stamp set. 

Thanks for taking a look! I will be back tomorrow for Day 3 of sneak peeks. Stop by the Papertrey Blog for more more inspiration with the new products.


8/11/21

Papertrey Ink August Release Day 1 - Pumpkin Bouquet

Hi and welcome to Day 1 of sneak peeks at the Ink to Paper August Release. August's release kicks off the Holiday creating season! Everything will be available for purchase beginning at 10 PM EDT on August 15th!

I have a number of projects to share with you so let's get started! 

My cards today showcase the new Fall Bouquet Stamp Set and Fall Bouquet Dies which pair perfectly with the the new Cover Plate: Maple Leaves. I cut the cover plate from Classic Kraft Cardstock. Next I cut a piece of watercolor cardstock to fit behind the maple leaves and watercolored with fall colors. I also splattered the background with gold paint. When the paper was dry I glued the maple leaves background over the watercolored paper. 


On this card I chose to color the images with Copic Markers. I added a sentiment from the stamp set and centered the pumpkin and foliage on the circle cut from vellum. 

Supplies 

Stamps: Fall Bouquet
Dies: Fall Bouquet, Cover Plate: Maple Leaves, Love to Layer: Scalloped Circle Die
Ink: Cocoa Bean, Ripe Avocado
Paper: Classic Kraft, Stamper's Select White, Vellum
Other: Gold Jewels, Gold Paint, Watercolors, Copic Markers

My second card is created in a similar fashion as the first card but this time I just added a piece of patterned  paper behind the maple leaves card front cut from Ocean Tides cardstock. I also used the stamps in set to stamped all the leaves and flowers. 


The circles on the cards are cut with the Love to Layer: Scalloped Circle Die. I tied twine around the center of the card and tied a double bow. 

Supplies
Stamps: Fall Bouquet
Dies: Fall Bouquet, Cover Plate: Maple Leaves, Love to Layer: Scalloped Circle Die
Ink: Cocoa Bean, Lemon Tart, Harvest Gold, Scarlet Jewel, Pure Poppy, Canyon Clay, Orange Zest, Ripe Avocado, Ocean Tides, Antique Linen Distress Ink
Paper: Stamper's Select White, Ocean Tides, Patterned Paper
Other: Rain Stones, Twine, Copic Markers


Next up is a slimline card. Here I used the new Darling Stand Dies along with the Fall Bouquet Stamps and dies. First I cut a piece of white cardstock to fit the card front. Then I blended Lemon Tart, Orange Zest, and Pure Poppy Inks. 


I added the wood floor with the Woodwork Die and Classic Kraft Cardstock. The sentiment if from the new Just Sentiments: Happy Fall Stamp Set, stamping on Vellum and embossing with gold embossing powder.

Supplies
Stamps: Fall Bouquet,Just Sentiments: Happy Fall
Dies: Fall Bouquet, Darling Stand Dies
Ink: Cocoa Bean, Ripe Avocado,Classic Kraft, Scarlet Jewel, Pure Poppy, Canyon Clay, Orange Zest, Lemon Tart, Harvest Gold, Versamark
Paper: Classic Kraft, Gold, Stamper's Select White, Vellum
Other: Gold Jewels, Blender Brushes, Gold Paint, Gold Embossing Powder

My last card features the Feathered Friends Mini 14 Stamp Set and Dies. The bird is stamped in Spring Rain, Enchanted Evening, Fine Linen, and Ocean Tides Inks. I used the Border Bling: Skinny Postage Frames Die and Ocean Tides Cardstock to frame the bird and another sentiment from the Just Sentiments: Happy Fall Stamp Set. 


I used the Cover Plate: Maple Leaves and Enchanted Evening Cardstock to create the card front. 

Thanks for taking a look! I will be back tomorrow for Day 2 of sneak peeks. Stop by the Papertrey Blog for more more inspiration with the new products.