Hi and thanks for stopping by today! I have two projects to share with you that I created with the new Spellbinders Trim A Tree Collection. The collection included a Layered Christmas Tree Stencil, O Christmas Tree Etched Dies, and the Shining Christmas Tree Glimmer Hot Foil Plate & Die Set.
To create the background I cut a piece of dark blue cardstock to fit the card front and blended Chipped Sapphire Distress Ink on the outside edges. Then I used the Layered Christmas Tree Stencil with Journey Modeling Paste to add the snow to the background.
Next I created the other elements to create the scene. I die cut the snow for the tree, added a little Journey Modeling Paste to the edges, and sprinkled the paste with glitter. I used the Shining Christmas Tree Glimmer Hot Foil Plate & Die Set, with Gold Glimmer Foil, to create the sentiments. The star and ornaments are die cut from Mirror Gold Cardstock.
Here's a closer look at the finished project. I used foam tape to attach the tree to the card front to just add a little dimension.
S3-419, GLP-219, STN-003, JM-0073, GLF-014, SCS-118
Other: Tim Holtz Distress Ink in Chipped Sapphire and Rustic Wilderness, Scotch Foam Mounting Tape, Bearly Art Craft Glue, Taylored Expressions Blender Brushes
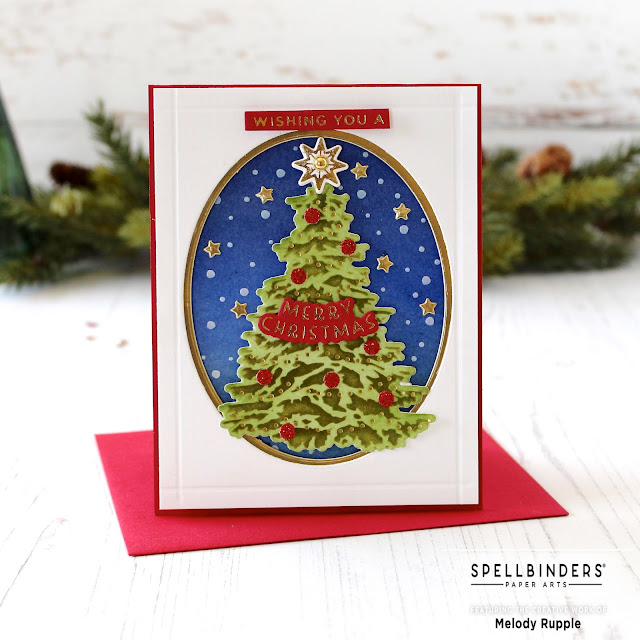
Here is my second card I created with all the same products. On this card I used the stencil and dark green ink to add the detail to the tree. I cut a piece of white cardstock to fit the card front and the die cut an oval directly into the card front. I cut a slightly smaller oval from Mirror Gold Cardstock to use as a mat.
I used the Shining Christmas Tree Glimmer Hot Foil Plate & Die Set to add the gold foil to the tree garland, sentiment, and star. I finished off the card with a few score lines around the edges of the card.
S3-419, GLP-219, STN-003, JM-0073, GLF-014, SCS-118, S4-110
Other: Tim Holtz Distress Ink in Blueprint Sketch and Chipped Sapphire, Taylored Expression Sweet Basil Ink, Taylored Expression Red Glitter Cardstock, Scotch Foam Mounting Tape
Thanks for taking a look!


No comments:
Post a Comment