5/26/17

You Are Wonderful

Thanks for stopping! I am looking forward to a three day weekend! A little extra time to have some fun and and spend a little time in craft room. Today I have a sweet card to share that I created with the Pretty Pink Posh Woodland Critters Stamp Set and the Woodland Critters Coordinating Dies.


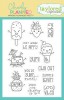
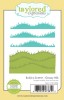
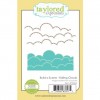
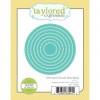
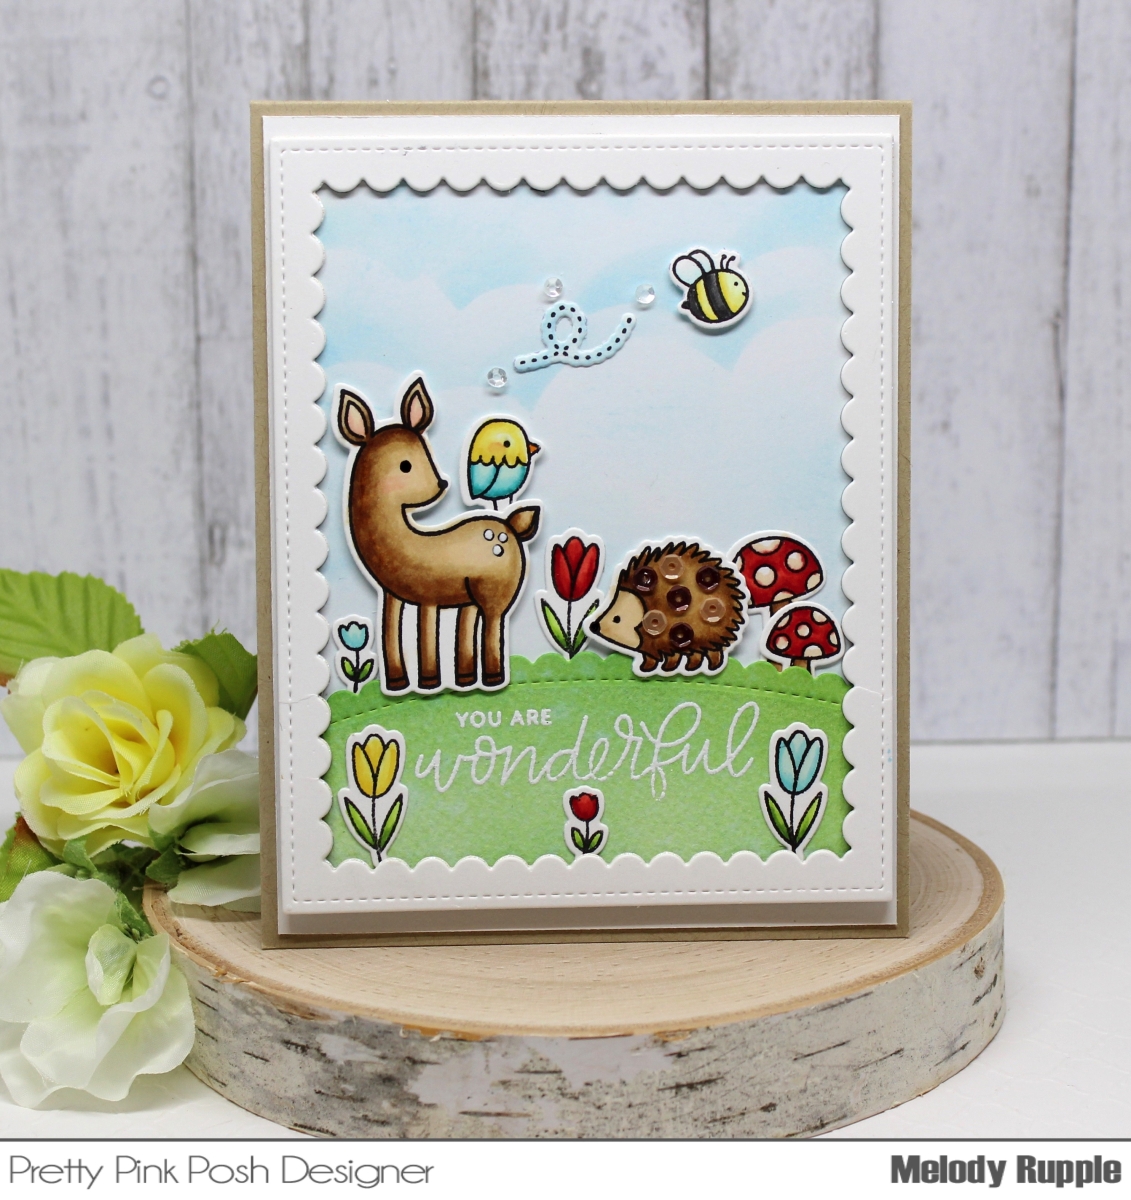
I love the Pretty Pink Posh Woodland Critters Stamp Set. It is back in stock and Pretty Pink Posh is having a sale this weekend! (See the details below) All the stamped images are colored with Copic Marker. The background is created with Distress Inks. The grass hill is cut with the Scallop Borders 2 Dies and the sentiment is included in the stamp set. The frame is cut with the Scallop Frames Dies


I added highlights to the deer with a white gel pen. I added sequins from the 4mm Nature Sequins Mix to the porcupine and a few Sparkling Clear Sequins Mix around the bee. The little bee is from another stamp set, the Bee Friends Stamp Set and die cut with the Bee Friends Coordinating Dies

Thanks for taking a look! Have a great weekend. 


5/22/17

Cupcake Celebration with Maya Road

Hi Everyone! I am up on the Maya Road Design Team Blog today sharing a couple projects I created with the Celebrate Cupcake Die Bundle. You can find all details and links to all the products I used HERE


Thanks for stopping by! 


5/19/17

Sending Happy Thoughts

Hi and happy Friday! It's a beautiful day here in San Diego. Finally, it feels like spring! I popping in to share a shaker card I created with some new products from Pretty Pink Posh.


My first step in creating this card was to stamp the background pattern with the Build A Bloom Stamp Set. I stamped in a white pigment ink and then embossed with white embossing powder. Next I used a stencil brush and an aqua ink to create the soft colored background. I didn't worry to much about getting ink on the flowers since I knew I would use my Copic Markers to color them. I also stamped a few solid leaves in a green. 


Next I used the Scallop Hexagons Dies to cut the hexagon straight into the card front to create the shaker. I set the die cut piece back into the hexagon matching the pattern I had stamped. Behind the hexagon I added acetate and form tape. The sentiment is from the Thoughtful Greetings Stamp Set and I dropped in Mini Sparkling Clear Flower Sequins and Sparkling Clear Confetti Mix

Have a great weekend! I hope you get a chance to be creative!


5/16/17

Curtain Call Inspiration Challenge - Frosting

Thanks for stopping by today! It is time for a new Curtain Call Inspiration Challenge - Frosting. I hope you get a chance to play along. The LEAD of this challenge will be invited as a Guest Designer in a future challenge.


Inspired by the word frosting I created this tag with the Celebrate Cupcake Die Bundle from Maya Road. The sentiment is also cut with a die from Maya Road, the Fanciful Be Happy Mine Steel Die.  Love the font! I cut the sentiment two time, once from white cardstock and once from a light weight chipboard. I glued the two layers together to add a little more depth to the sentiment and sponged on a pink ink. 


I added crystal drops to the cupcake and then cut the flower from felt. I added two Small Vintage Paper Flowers in White and two Leaf Trinket Pins

Thanks for taking a look! 

Please welcome our newest Guest Designer,
Sonja Kerkhoffs, The Art of Stamping 

5/15/17

Don't Worry Be Happy

Hi Everyone! I am excited to be joining the Taylored Expressions Clearly Planned Design Team today.   TE is releasing a new collection of Clearly Planned Products that not only work for planners but that would also work well for cards!

I have a card to share with you that I created with the new Super Sweet Stamp Set.


These cute stamp images make me smile! I stamped them in Oreo Ink on Sugar Cube cardstock. I also stamped each image on masking paper and cut them out to create a mask to cover the images so I could create the background. I used Salt Water Taffy and Sprinkles Ink with a Clarity Stencil Brush to ink the background. Then I colored the images with Copic Markers. 


The clouds are cut with the Build a Scene - Rolling Clouds Die and the grass with the Build a Scene - Grassy Hills Dies. The sentiment is from the stamp set, stamped in Sugar Cube Ink and embossed with white embossing powder. I finished off the card with a few Snow Flurries Sequins.


For a limited time, earn DOUBLE CRAFTY POINTS on our Clearly Planned Super Sweet Stamp and Coordinating Dies Bundle and on ANY of our spiritual Clearly Planned stamp sets! If you're not a Crafty Points member, it's free and easy to join. Just create an account at the TE webstore and you're automatically enrolled to begin earning crafty points with every purchase. 

You'll earn DOUBLE CRAFTY POINTS on the purchase of one or more of these Clearly Planned products:  74 Crafty Points on our Super Sweet Stamp and Coordinating Dies Bundle30 Crafty Points on our Faith Hope Love stamp set; and 16 Crafty Points EACH on our Yahweh, Faith Fulland I Am stamp sets! 

Offer valid on qualifying purchases made between 9am CST on Thursday, May 18, 2017 and 11:59 pm CST on Sunday, May 21, 2017 and only while supplies last. Crafty Points are only available on purchases made via our retail site: www.tayloredexpressions.com.

Thanks for visiting! If you'd like to see more projects and new product information, please head over to the TE Blog for a complete list of our participating designers!

5/11/17

Pretty Pink Posh Product Release Blog Hop

Welcome to Day 1 of the Pretty Pink Posh Product Release Blog Hop! You should have hopped here from Amanda Korotkova's Blog. If you'd like to start at the beginning of the hop you can start at the Pretty Pink Posh Blog.


Be sure to leave a comment on each stop! There are 4 $25 gift certificates up for grabs, two winners each day! Winners will be picked randomly along the blog hop. Comments must be left by 11:59 PM PST on 5/17/2017. Winners will be announced on the PPP blog.

I have a few projects to share with you today that I created with some of the new products.


First up is this sweet card created with the new Woodland Critters Stamp Set and the Woodland Critters Coordinating Dies. I colored the images with Copic Markers and added a few details with a black gel pen and a white gel pen. 

I used  a stencil brush to create the soft background. The scallop edge is die cut with the new Scallop Borders 2 Dies. I added the flower detail with the new Build A Bloom Stamp Set and die cut with the Build A Bloom Coordinating Dies. The card is finished off with sequins from the new Spring Meadow Sequins Mix


My next project is a set of three tags. I love having tags ready to go when I need them! These were easy to put together with the new Scallop Circle Tags Dies.

I used Distress Inks to create all my backgrounds on the tags. This sentiment is from new Thoughtful Greetings Stamp Set. This stamp set has great sentiments in such a beautiful font! The stamped images are included in the Woodland Critters Stamp Set and die cut with Woodland Critters Coordinating Dies. The sequins are from the new 4mm Nature Sequins Mix

Here is another sentiment from the Thoughtful Greetings Stamp Set. I stamped the sentiment and flowers in gold ink and embossed with gold embossing powder. The flowers are from the new Bold Blooms Stamp Set and die cut with the Bold Blooms Coordinating Dies. The cute flower sequins are from the new Hydrangea Flowers Sequins Mix


To create this last tag I used the new Bee Friends Stamp Set and the Bee Friends Coordinating Dies and a few Sparkling Clear Confetti Mix

Thanks so much for stopping by my blog! Here is the list of the designers sharing project today. Now it's time to hop on over to Yulis Kartika's Blog! 


Melody Rupple (You are here)


5/4/17

Hello Friend - It's Release Day at Taylored Expressions!

It's release day at Taylored Expressions! All the new May products are available at the TE web store NOW.  I have two cards to share today showcasing a number of the new products. 

My first card features the new Wagon Bouquet and the coordinating Wagon Bouquet Die


I created the scene by using a Clarity Stencil Brush and Potato Chip Ink to create the soft, yellow background. Next I added the grass with the new Build a Scene - Grassy Hills Dies and the clouds with the Stitched Cloud Duo. Then I attached the frame cut with the Frame in Frame 2 Cutting Plate. 


The wagon and flowers are colored with Copic Markers and then die cut with the Wagon Bouquet Die. I added Cherry Pop Enamel Shapes to the wheels. I stamped a sentiment from the stamp set in Sugar Cube Ink, embossed with white embossing powder and then die cut the sentiment with the Stitched Banner Stacklets. I attached the banner to a toothpick. 


My next card features the new Pinhole Stars Stacklets. On the largest star I brushed on Potato Chip Ink and stamped the Twinkle, Twinkle Star Background. I stamped a sentiment from the new Pow!Boom!Wow Stamp Set. The Pin Hole Star Stacklets work with the Star Stacklets, making it easy to layer stars and add a different color star being the pinholes. 


I colored the girl super hero in the My Super Hero Stamp & Die Combo with Copic Markers and then used the coordinating die. The background is embossed with the Lots of Stars Embossing Folder. I finished the card off with a few stars from the Lemon Meringue Enamel Shapes.