1/31/18

Just A Note

Hi Everyone! I have a "Just A Note" card to share today. I like having this type of generic card in my stash. You can send it for almost any occasion. I used products from Taylored Expressions.


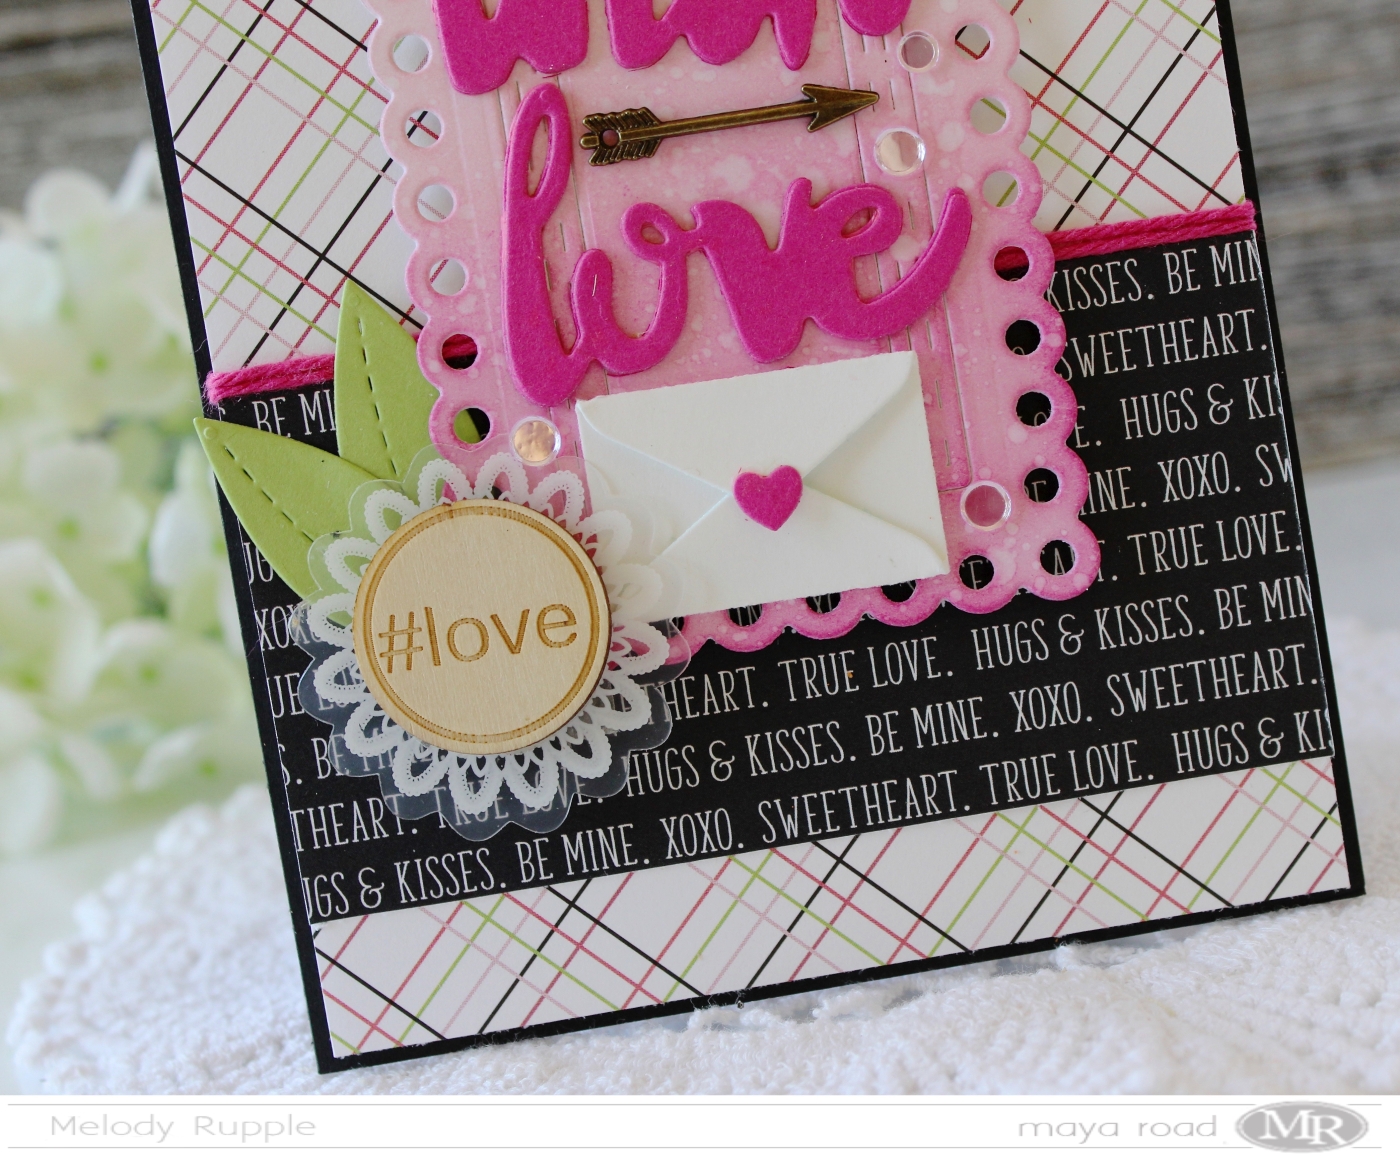
I seem to be drawn to black and white stripes lately. I just purchased a black and white sweater and a tee shirt! I created this background with the Striped Background Stamp. I used Sugar Cube Cardstock and Oreo Ink. Then I cut a circle directly into the card front. Behind the circle I added a panel of Sweet Tooth cardstock that I lightly brushed with Cupcake Ink. 


The wreath is created with the Spring Florals Stamp Set and coordinating Dies. At the top I added a Metallic Gold Twine Bow. I added Enamel Shapes to the center of the flowers and inished off  with a few drops of Nuvo Crystal Drops. 

Here are the links to the products I used to create this card. Have a good week and thanks for stopping by! 


1/29/18

Birthday Wishes

Hi Everyone! I have a birthday card to share featuring the newly released Birthday Friends Stamp Set and the Birthday Friends Coordinating Dies.


I chose a color scheme for the card that could be used or a either a birthday boy or a birthday girl. 

I colored the images with Copic Markers and used a Nuvo Aqua Shimmer Pen to add glitter to the cake frosting. I added the polka dots to the dress with a white gel pen. Then I die cut the images with the Birthday Friends Coordinating Dies


Next I cut the new Storybook 6 Die twice, once from a patterned paper, that was cut to fit the card front,  and once from watercolor paper. On the patterned paper I stamped a sentiment from the Birthday Friends Stamp Set in black ink. On the watercolor paper I sponged on distress ink and spritzed the paper with water. 

On the back of the card front I added foam tape. The foam tape adds dimension to card and leaves me a little space to attach the stamped images. 

I inlayed the watercolor squares and rectangles into the card front and the attached the stamped images using foam tape. 


The card is finished of with a few sequins from the Sparkling Clear Confetti Mix

Thanks so much for stopping by! Have a great day. 


1/24/18

With Love

Hi all! Thanks for stopping! I have a Valentine's Day card to share with you that I created with a few Maya Road Dies and embellishments. 


To create my card I die cut the Scalloped Frame ATC Die from Bristol Smooth Cardstock and sponged on distress inks and then splattered the paper with water. Next I used the DIY Mini Envelope Die to create a sweet, little envelope. 


The sentiment is die cut with the "With Love" Script Die. I attached a Mini Arrow Charm and a few sequins from the Sparkling Clear Confetti Mix for Pretty Pink Posh. The pattern paper is from the True Love 6×6 Pad from Reverse Confetti. 


I attached a Wood Hashtag Tokens and die cut two leaves with the smaller leaf die in the Flower Die Set. I added twine cording around the middle of the card and then attached the die cuts and embellishments with foam tape. 

Thanks for taking a look!

1/17/18

Sending My Love

Hi and thanks for stopping by! I have working on getting my Valentines ready to go. I need a card for a special 11 year old boy in my life. A boy and a preteen! I decided to use the Taylored Expressions You Have My Heart Stamp Set and coordinating dies. The stamp set works great with the Mini Wobble Springs and I think he will get a kick out the bouncing head!


The stamped image is colored with Copic Markers. The body and the head are two separate pieces. I die cut with the You Have My Heart Dies and attached a  Mini Wobble Springs to the back of the heard.

I used patterned paper from the Playful Patterns - Valentine Paper Pack and cut a heart directly into the card front with the Heart Stacklets. Behind the heart I added a piece of watercolor paper that I sponged with Distress Ink and added the heart detail with the Pierced Heart Stacklets.


The card is framed with the Stitched Frame Stacklets 1. The sentiment is from the stamp Set and the glittered hearts are die cut with the Little Bits Hearts. 

Thanks for taking a look! Have a great day! 


1/10/18

Pretty Pink Posh January Release Blog Hop

Hi and welcome to the Pretty Pink Posh January Release Blog Hop! Pretty Pink Posh is celebrating their 4th Birthday and we are excited to share the new release with you!


I have two cards to share today that send thoughts of love to someone special! 


I used the new Love Shaker Die to create this shaker card. I started by cutting a piece of watercolor paper to fit just inside the card base. I cut the Love Shaker Die directly into the card front so that I could tell where I wanted to place the stamped hearts. Next I stamped the sentiment and a variety of hearts from the new Love Sentiments Stamp Set in copper ink and embossed with copper embossing powder. To add color to the background I used a blending took and Distress Oxide Ink in Worn Lipstick. 


I die cut the  Love Shaker Die again from a copper foil cardstock and inlayed the die cut in the center of the card. Behind the heart window is acetate and foam tape to for the shaker. I dropped in two of the new sequins mixes, Rose Gold Heart Confetti and Iridescent Heart Confetti Mix


My next card features the new Cupid Friends Stamp Set and the Cupid Friends Coordinating Dies. I started out with a panel of watercolor paper again, I stamped hearts from the Cupid Friends Stamp Set in white pigment ink and embossed with white embossing powder. Then I sponged on Distress Ink in Tumbled Glass and spritzed the paper with water. 


The cutout is die cut with the Window Frames Dies and I added the scalloped border with the Stitched Borders 4 Dies. The sweet cupids are colored with Copic Markers and die cut with the Cupid Friends Coordinating Dies.. I finished off the card with sequins from the Assorted Heart Confetti Mix


Thanks for hopping along! Be sure to leave a comment for a chance to win! You can stop by the Pretty Pink Posh Blog for all the details! 

Here is the list of designers sharing projects for Day 1 of the Blog Hop:


1/2/18

Thinking of You with Pretty Pink Posh

Hi All! I am starting off the new year with a happy card from Pretty Pink Posh. First I am very happy to say that I will continuing to be designing for Pretty Pink Posh in the New Year! I love working with the PPP product line and with Paulina! Secondly, the Pretty Pink Posh store will be re-opening on January 4th just in time for new release on January 10th!


I created this card with the Bee Friends Stamp Set and the Smile Shaker Die. First I used a stencil to create the background pattern. I cut the Smile Shaker die twice, once directly into the card front and again from black card stock. Then I inlayed the black die cut into the card front. 

Behind the circle I added clear acetate and foam tape to form the shaker. I dropped in sequins from the Sparkling Clear Confetti Mix and closed the circle with pale blue cardstock. 


The bees are colored with Copic Markers and die cut with the Bee Friends Coordinating Dies. The sentiment is included in the stamp set. 

Thanks for stopping by! Be sure to stop by the Pretty Pink Posh Blog for the Design Team Announcement!