Showing posts with label Family. Show all posts

4/7/26

The For Her Release from Taylored Expressions

Today's Taylored Expressions new release is For Her! The release is full of beautiful sewing and stitching inspired products, and a pretty family tree. All the products are available now in the TE Store. 


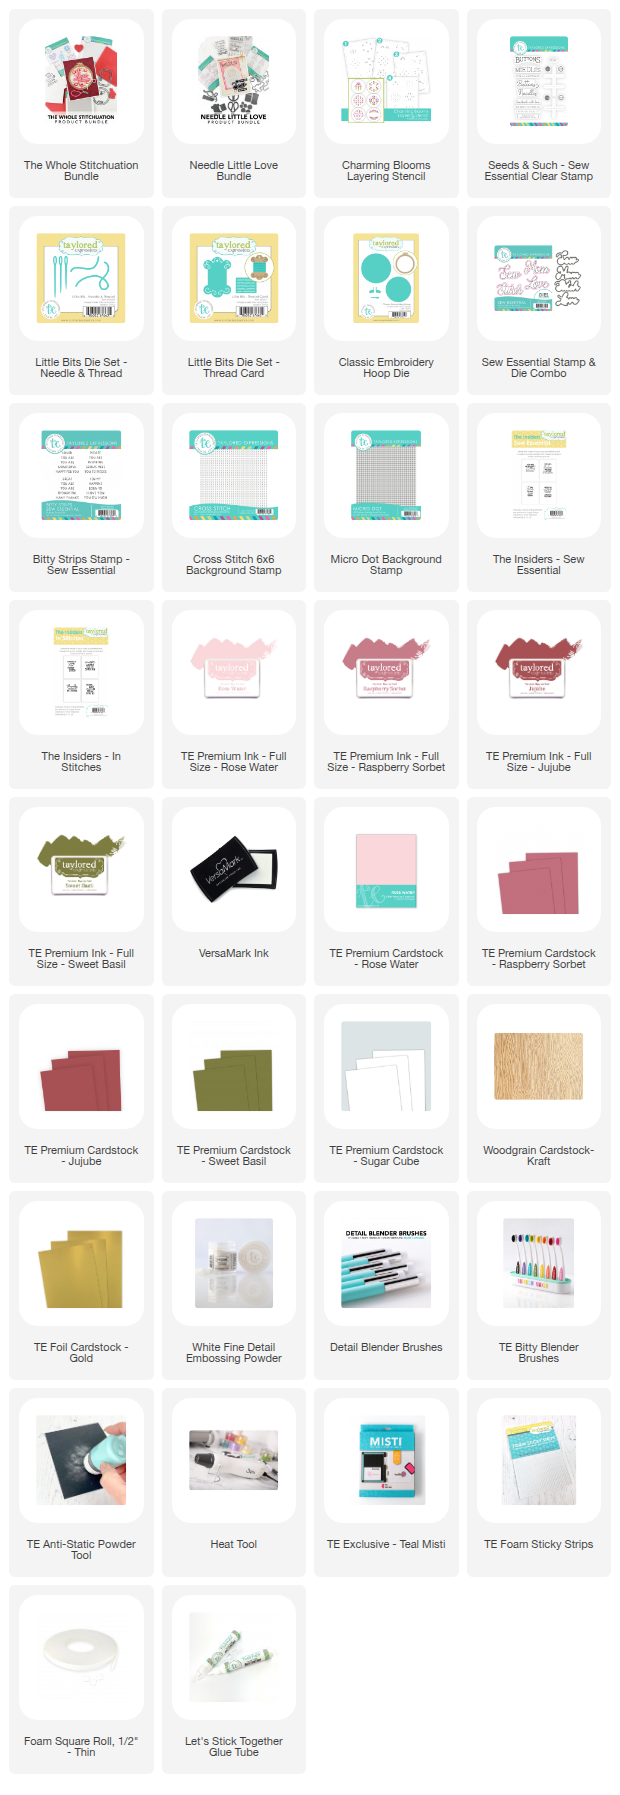
My first two projects feature some of the new stitching and sewing products. I used a color combination of Rose Water, Raspberry Sorbet, Jujube, and Sweet Basil Inks and Cardstock. 

There are two different embroidery hoop dies in this release. I used the Classic Embroidery Hoop Die with the Woodgrain Cardstock - Kraft. I used the new Charming Bloom Layering Stencil for the designs inside the hoops. 


I used the new Micro Dot Background Stamp with Rose Water Ink to add the background behind the stenciling, perfect for the look of counted cross stitch fabric. I used the Little Bits - Needle and Thread and Little Bits - Thread Card to die cut additional embellishments. 


The card front background is stamped with the Cross Stitch 6x6 Background Stamp. 


The larger sentiments are stamped and die cut with the Sew Essential Stamp and Die Combo. I stamped in Versamark Ink and embossed with TE White Embossing Powder. The smaller sentiments are from the new  Bitty Strips - Sew Essential Stamp Set and die cut with the Bitty Strips Die. 


The Embroidery Floss sentiment on the thread card is included in the Seed & Such - Sew Essential Clear Stamp Set. 


I used TE Gold Foil for the needle and embroidery hoop top. 
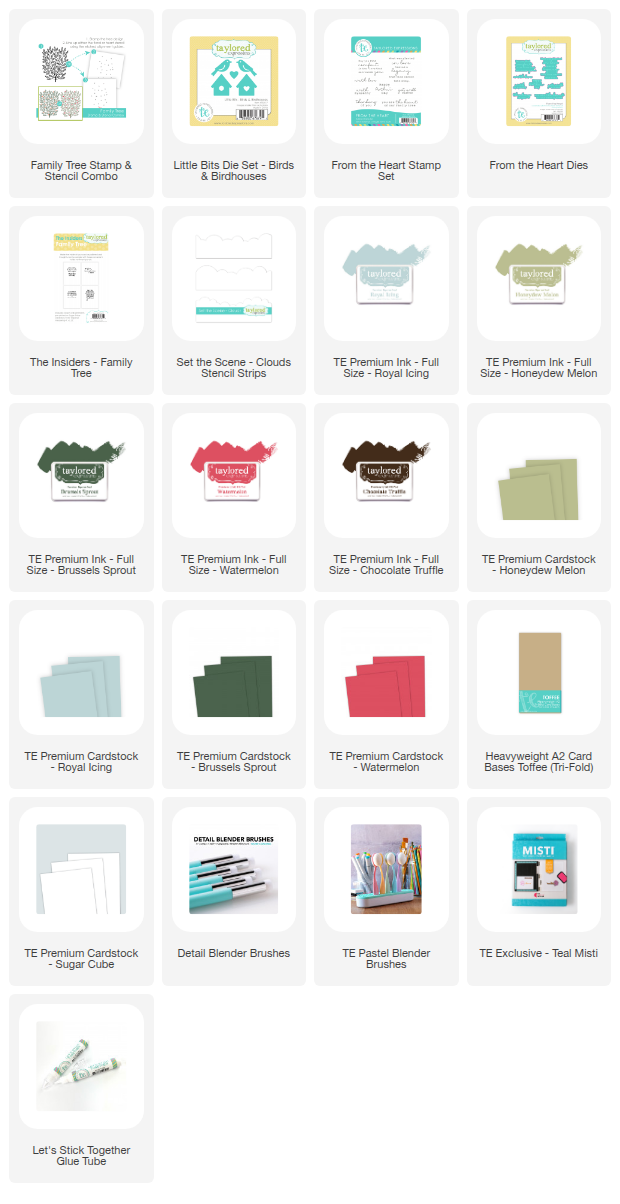
My next card showcased the new Family Tree Stamp and Stencil Combo. You can stencil hearts or flowers. The tree is stamped in Brussels Sprout Ink and I used Watermelon Ink to stencil the hearts. 


I created the background by using the Build-A-Scene - Cloud Stencil Strips with Royal Icing Ink and blending Honeydew Melon Ink at the bottom. 


I added the birds and birdhouses with the Little Bits Die Set - Birds and Birdhouses and the sentiment if from the From the Heart Stamp Set. 
Happy crafting! Stop by the TE Blog for all the details on the three bundles, new products, and more inspiration from the team. 


4/9/24

For Her Release from Taylored Expressions

Hi Crafters! Today I have projects to share from the new For Her Release at Taylored Expressions. These products are perfect for Mother's Day and for all the women in your life throughout the year. The products are available now in the TE Store


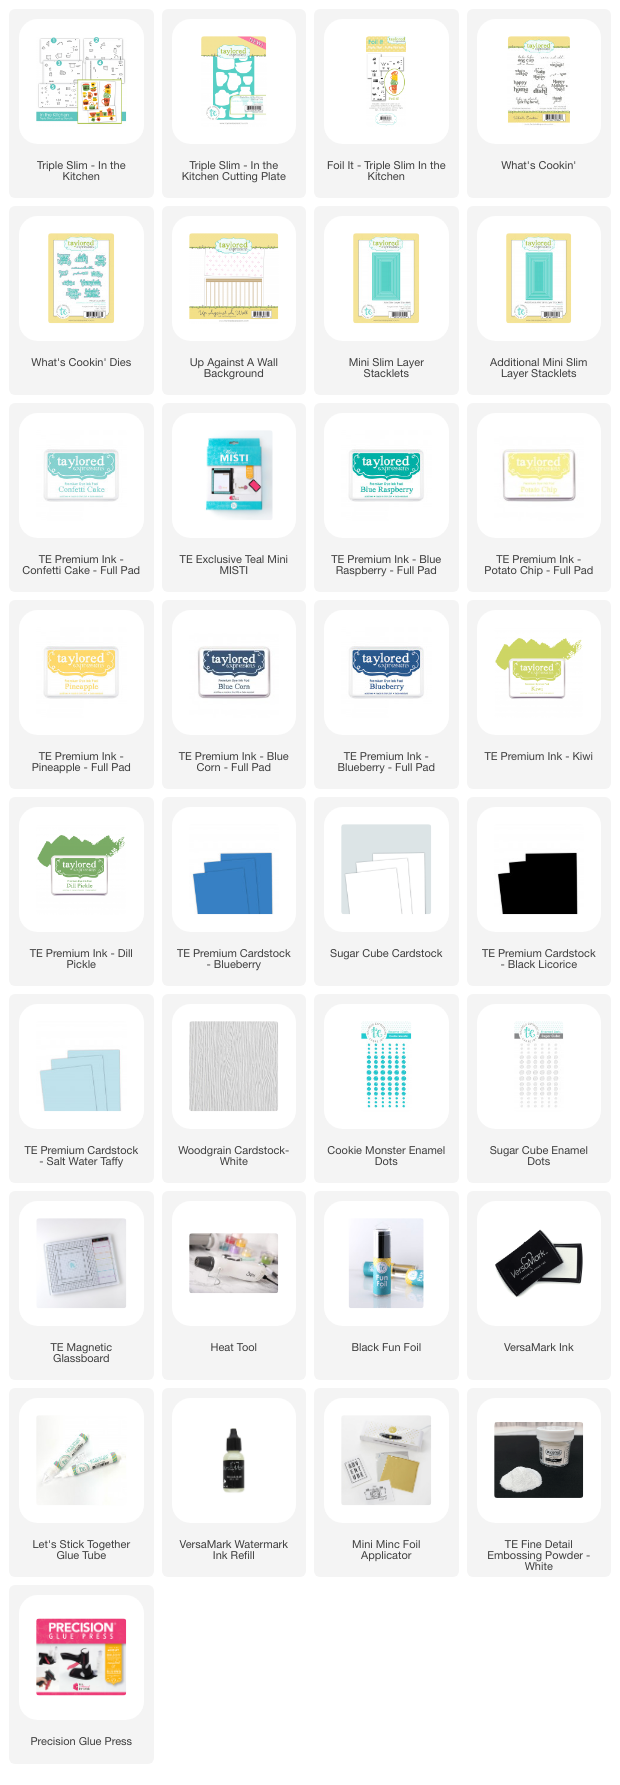
My first two cards are created with the Triple Slim - In the Kitchen Stencil and Triple Slim - In the Kitchen Cutting Plate. Once you stencil the kitchen items the die cuts all the pieces out at one time! I listed the inks I used with the stencil below.  

To create the card front I stamped one of the two stamps in the Up Against A Wall Stamp in Blue Raspberry Ink on Salt Water Taffy Cardstock. I cut a strip of TE White Woodgrain Cardstock to add the shelf at the bottom of the card. 


The sentiment is from the new What's Cookin' stamp set and die cut with the coordinating What's Cooking' dies. I added Cookie Monster Enamel Dots to accent the kitchen items. 


My next card is created in the same manner except I used one of the Foil It - Triple Slim In the Kitchen Panels with TE Black Foil. I also used the second stamp in the Up Against the Wall Stamp Set, stamping in Versamark Ink on Salt Water Taffy Cardstock and embossing with TE White Embossing Powder. 


I added another sentiment from the What's Cooking' stamp set and added a few Sugar Cube Enamel Dots. 


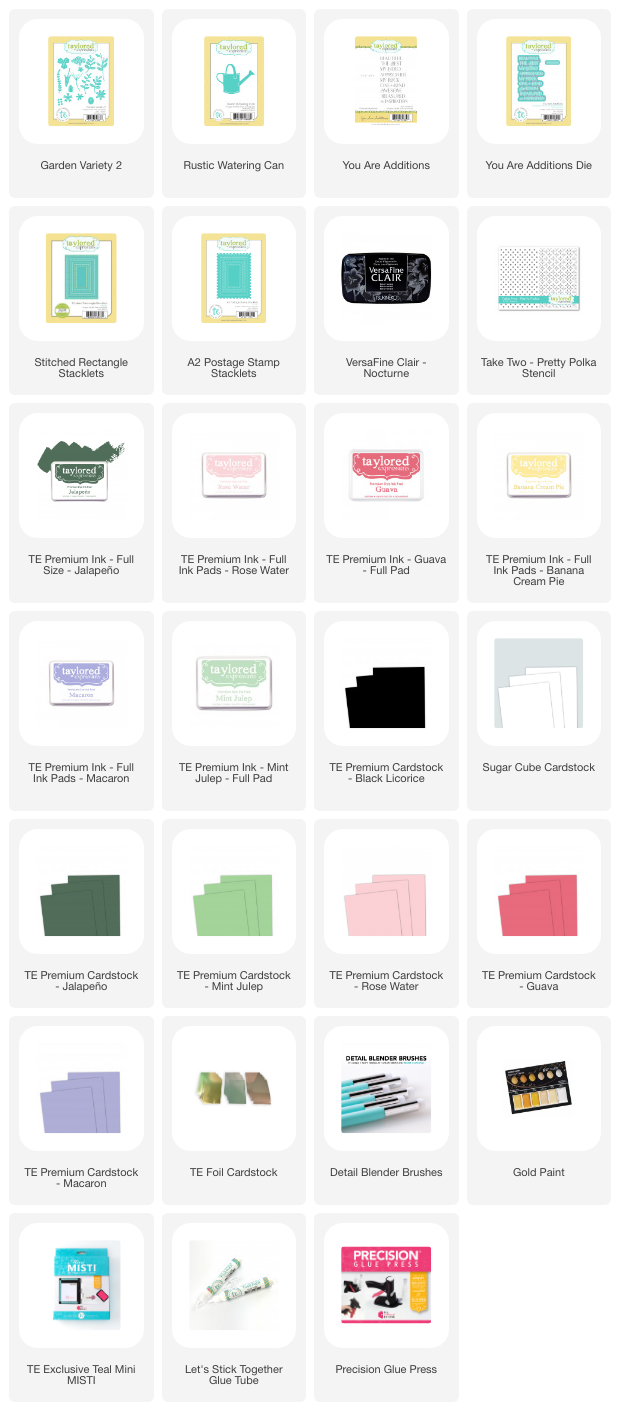
Next up is a look at the Garden Variety 2 Dies and the Rustic Watering Can Die. I started by die cutting the watering can from Licorice Cardstock, adding accents with a gold gel pen and lightly splattering gold paint. 

Next I die cut the flowers and greenery from the cardstock colors I have listed below, blending a little ink in the centers and edges. I used TE Gold Foil to add the centers to the flowers. 


This sentiment is from the beautiful You Are Additions Stamp Set and die cut with the coordinating dies. I used the Stitched Rectangle Stacklets and Rose Water Cardstock to add the center panel that is stenciled with the Take Two - Pretty Polka Stencil. I glued the panel to Sugar Cube Cardstock die with the A2 Postage Stamp Stacklets. 

Special for this week's release - win a summer trip to the studio! We'll be selecting 5 lucky winners to receive a studio visit package! Winners will get a free night hotel stay, local restaurant gift certificates, a goodie bag, studio gift card, and a private tour of the TE headquarters! To be entered to win, follow these 2 steps:

  1. Purchase any item from the For Her category
  2. Complete Google Form: Click Here
Thanks for stopping by. Stop by the TE Blog for all the details and more inspiration. 

3/25/23

Papertrey Ink March Release Day 2

Hi and welcome to Day 2 of the Papertrey Ink's March Release Countdown. Today I have cards full of family blessings and card for the graduate. Everything will be available for purchase beginning at 10 PM ET on Tuesday, March 28th  


My first card features the new Beauty in Motion Stamp Set and Dies. I love the graceful elegance of this stamp set. I stamped the flowers in Sweet Blush and Pale Peony Inks. 


I stamped the center of the flower and the frame in Versamark Ink and embossed with gold embossing powder. The stamp for the frame is part of the new Stationery Kit that I shared yesterday. I added a few gold drip dots to the card front. 


The sentiment if from the new Just Sentiments: Family Stamp Set. Continuing with the touches of gold I stamped in Versamark Ink and embossed with gold embossing powder on True Black Cardstock. 

Supplies:

Stamps: Beauty in Motion, Just Sentiments: Family, Stationery Kit
Dies: Beauty in Motion,  Love to Layer: Circles
Ink: Sweet Blush, Pale Peony, Versamark
Paper: Sweet Blush, True Black, Stamper's Select White, Gold Foil
Other: Gold Embossing Powder, Gold Sequins, Glue,Misti


The next card is created with the Cover Plate: Fanciful Flower Dies. I cut a piece of white cardstock to fit the front of the card and then die cut with the Cover Plate. Behind the cutouts I added a piece of Spring Moss Cardstock. Then I die cut the  Cover Plate: Fanciful Flower Dies three more times from Lemon Tart, Enchanted Evening, and Tropical Teal Cardstock and inlayed some of the pieces back in the card front. 


The larger sentiment is from the previously released Perfect Pairs: Commodities Stamp Set and Dies. The smaller sentiment is from the new Just Sentiments: Family. 


I finished off the card with a few clear jewels. 

Supplies:

Stamps: Just Sentiments: Family, Perfect Pairs: Commodities 
Dies: Cover Plate: Fanciful Flower, Perfect Pairs: Commodities
Ink: Enchanted Evening
Paper: Enchanted Evening, Stamper's Select White, Lemon Tart,  Spring Moss, Tropical Teal
Other: White Rhinestones, Glue


Next up is a look at the new Bright Future Stamp Set and Dies. The floral frame is colored with Copic Markers and then die cut. The framed sentiment fits perfectly inside the floral frame. The graduation hat is included in the set as are a number of Class of ..... sentiments. 


Behind the frame I added a panel of Bitty Big Collection: Lilac Grace. 


The card is framed with the largest die in the Border Bling: Skinny Stitched Frames.

Supplies:

Stamps: Bright Future
Dies:  Bright Future, Border Bling: Skinny Stitched Frames
Ink: Pure Black, Aqua Mist
Paper: Stamper's Select White, Lilac Grace,  Pure Black,  Bitty Big Collection: Lilac Grace
Other:  Foam Tape, Copic Markers

Thanks for stopping by! I will be back tomorrow with another look at the new release. Stop by the PTI Blog for more inspiration. 


12/13/20

Ink to Paper December Release Sneak Peeks Day 3

I am back for Day 3 of the Ink to Paper December Release Sneak Peeks. Today I have two more cards to share with you. Everything will be available for purchase beginning at 10 PM EDT on December 15th!


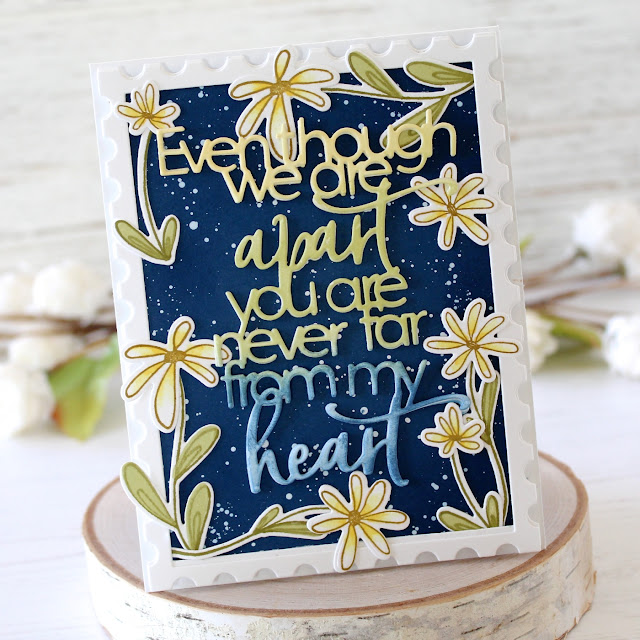
My first card is created with the new Dainty Daisies Stamp Set and coordinating Dies and the new To Die For Sentiments: Never Too Far Dies. I cut the sentiment out twice, once from Stamper's White Select Cardstock and once from a lightweight chipboard. I adhered the two die cuts together and then blended ink in Dark Indigo, Spring Moss, and Lemon Tart Ink. I attached the sentiment to a panel of Dark Indigo Ink I had splattered with white paint. 


The card is framed with the largest die in the Border Bling: Skinny Postage Frame Die. Then I added the sweet daisies to the edges of the card with the new Dainty Daisies Stamp Set and Dies


My second card features the new Lift Me Up Stamp Set and Dies. First a cut a piece of Aqua Mist Cardstock to fit the card front and then stamped the Brushed Plaid Stamp Set in Aqua Mist Ink. 


I stamped the images from the Lift Me Up Stamp Set, colored with Copic Markers, and die with the coordinating dies. I cut a frame from Pure Poppy Cardstock with the Border Bling: Skinny Diagonals Frame Die and added white cardstock stenciled with clouds behind the frame. 


I added glitter to the clouds and added a clear drops. 

Thanks for taking a look! I will be back tomorrow for Day 3 of sneak peeks. Stop by the Papertrey Blog for more more inspiration with the new products.