
In 2011, MFT is working harder than ever to inspire you, and we have come up with something we think you'll really enjoy. Our Design Team Creative Challenge is a new monthly feature, where we challenge our design team to explore their creative side using a specific theme, product or technique. This month, "It's a Wrap" Be sure to check the MFT Blog for a list of all the designers who have creative gift solutions for you today!

Sometimes it is just of fun to have a special box to put a gift in! I made a little box, that is so quick and easy to put together, and topped it with ribbon and a cute tag!
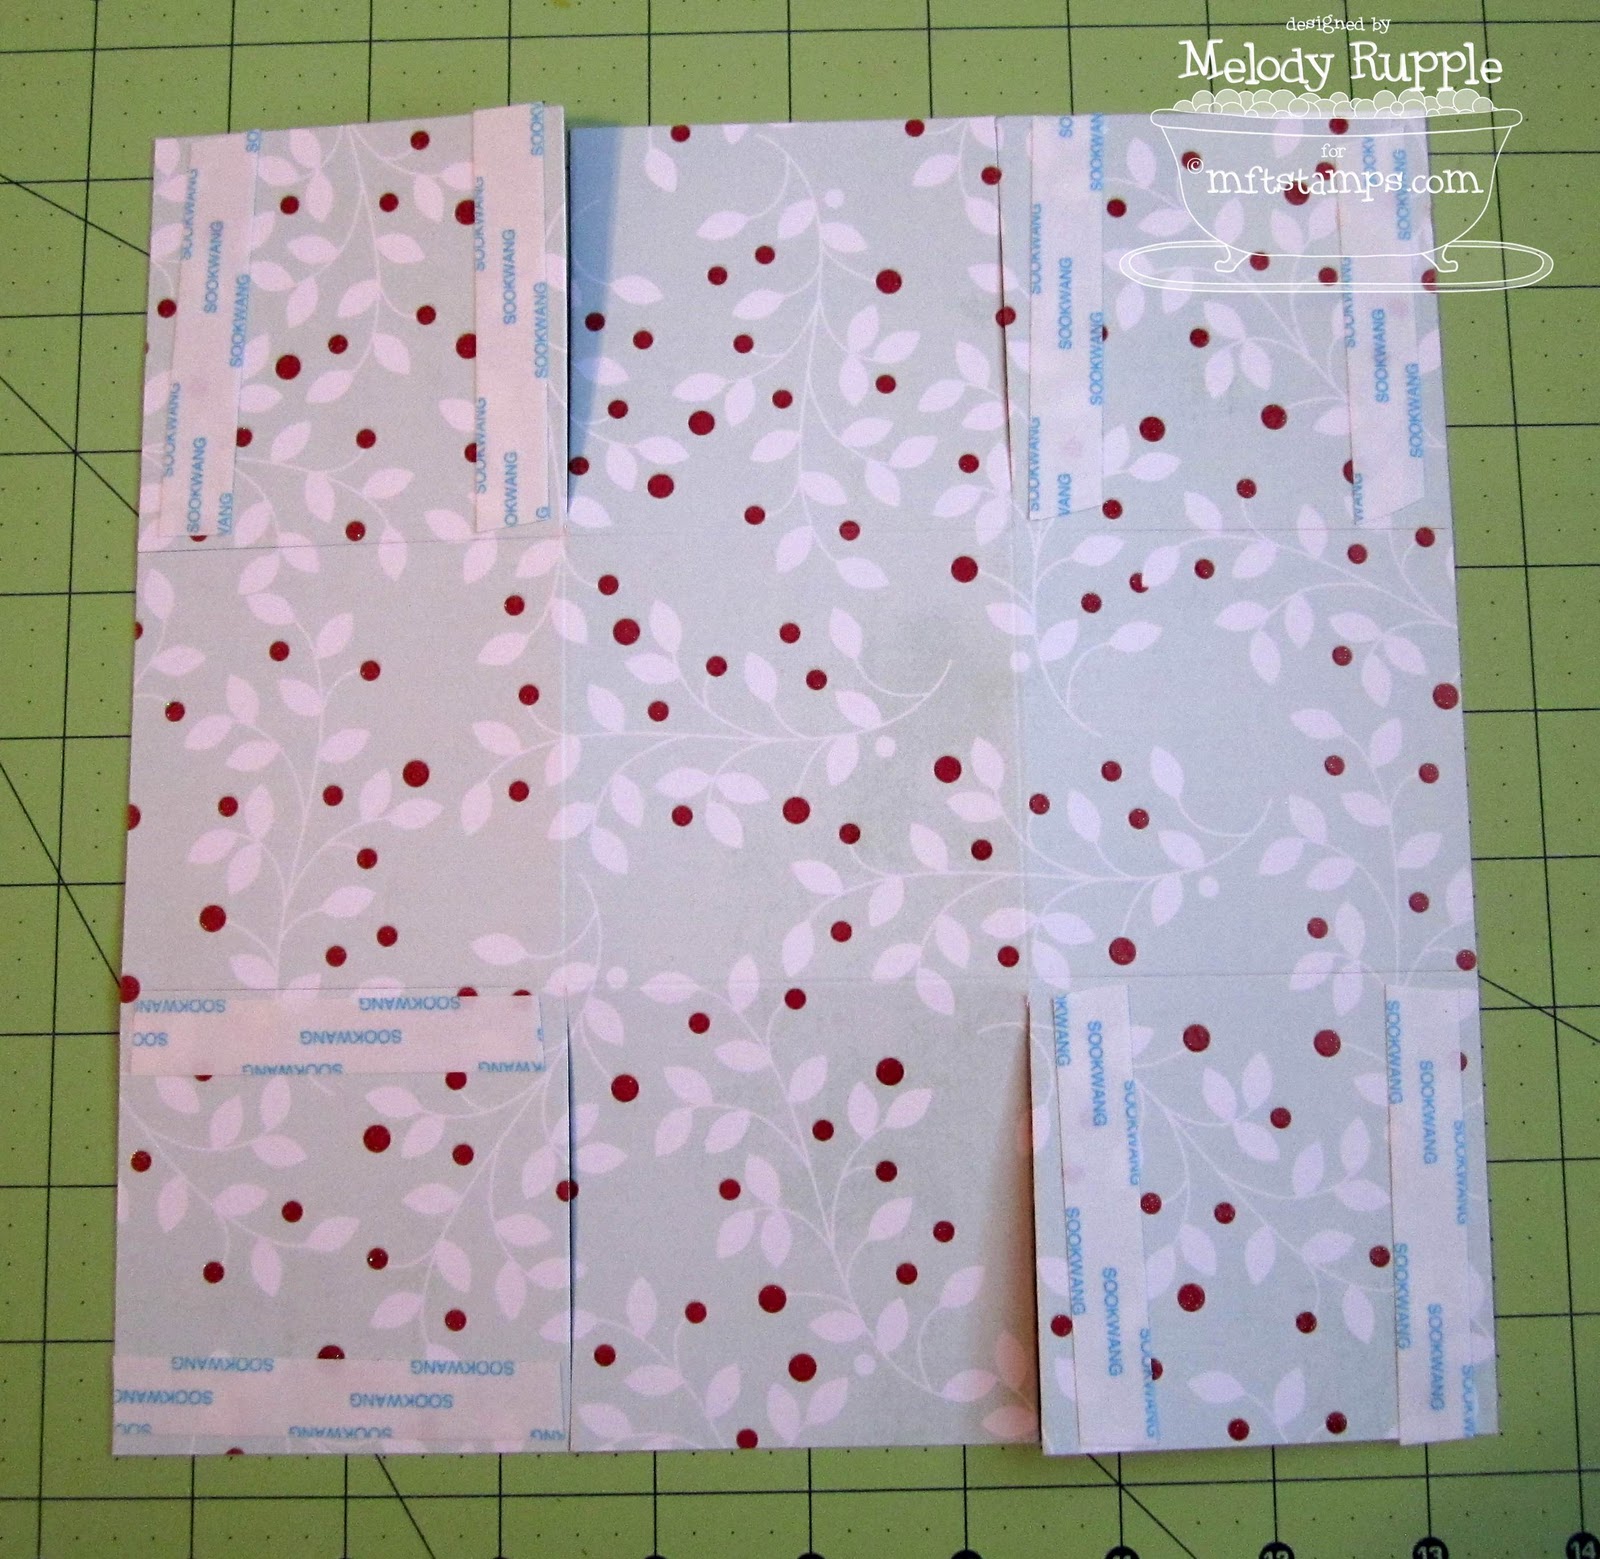
To make my box I cut a piece of patterned paper into a 9" x 9" square. I scored in each direction at 3" and 6" and cut along four of the score lines, stopping at the horizontal score lines as shown. I applied adhesive to the corners, and folded the flaps up at the score line to create a small box.
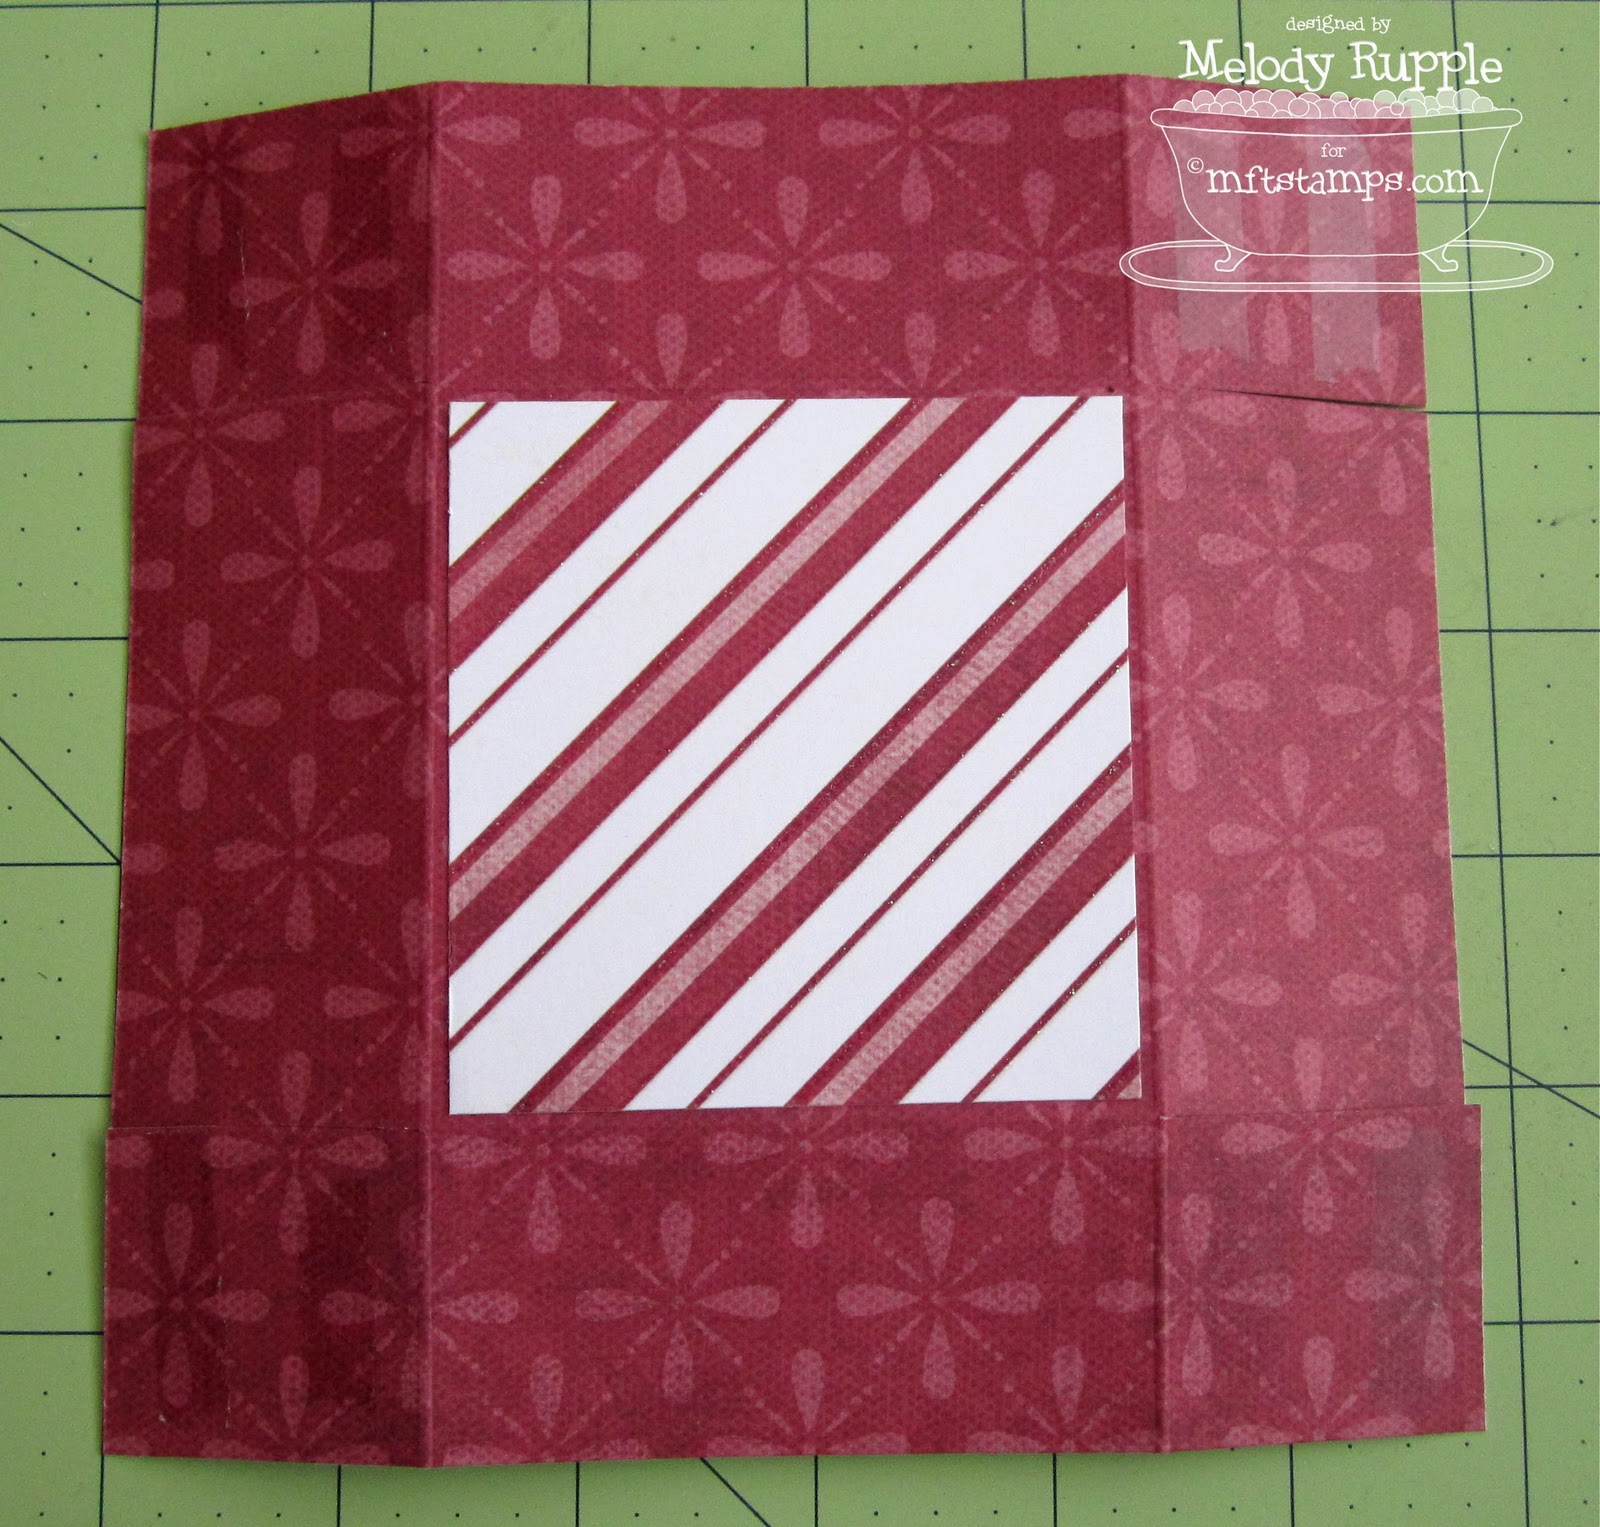
To make the lid I cut another piece of patterned into a 5 7/8" x 5 7/8 inch square. Then scored in each direction at 1 3/8" by 4 1/2". Cut four of the score line like you did for the box.

This is what the box looks like when it is put together. I added a border to the top of my box using the Small Scalloped Border Die.

I created by tag using the Tag You're Die-namic and the Christmas Ornaments Die-namic and Stamp Set.
I cut the tag out twice in two different patterned papers and cut the top off the berry patterned paper. I die cut one of the ornaments from the set and used a stamp for the set for the star in the center. It is mounted on a doily cut with the smaller die in the Dainty Doily Duo. Then I used the dies to add a little tag and holly leaves. I used Bakers Twine in Maraschino Red to hang my ornament and to tie it onto my little package.

I cut out my tag again in white cardstock and adhered it to the back of tag, and stamped "To:" and "From:" and a snowflake from the stamp set.


Thanks for stopping by! Be sure to stop by all the designers blogs today for lots more WRAPPING inspiration.
Melody


awesome Melody, you can never have too many boxes around this time of year :)
ReplyDeleteLove this little box and the tag really is DARLING!!!!
ReplyDeleteVery pretty, Melody! Love it! That tag is GORGEOUS, also.
ReplyDeletewhat a super cute box...love it!
ReplyDeleteThis is ADORABLE and such an awesome idea! Totally casing this for some gifties I have to wrap!
ReplyDeleteLOVE it Melody!!!
ReplyDeleteooooo! what a great box. love that the lid and top are two different patterns. sweet tag, too!
ReplyDeleteLove this little box, Melody! Thanks for the tutorial! Gorgeous card, too!
ReplyDeleteMelody, this is a neat little box!! Love the idea and the tag as well. Just Gorgeous!!
ReplyDeleteBeautiful gift box Melody!! Love that tag!
ReplyDeleteCrafty Hugs!
Meredith
Beautiful!!! Love your tag! Thanks for the how to, too :)
ReplyDeleteWhat a cute box!!! Thanks so much for sharing the little tutorial:-D
ReplyDeleteThis is so gorgeous Melody.
ReplyDeleteHugs Riet.xx
This is stunning. I love all the pretty details!
ReplyDeleteBeautiful, Melody. I have these papers that you used and have done a lot of cards with it. Wish I had time to decorate the boxes, too.
ReplyDeleteAny affectation whatsoever in dress implies, in my mind, a flaw in the understanding by Revathi
ReplyDeleteOh I love that tag!!!!
ReplyDeleteCalibration Software Pain reaches the heart with electrical speed, but truth moves to the heart as slowly as a glacier.Calibration Consultancy:)
ReplyDelete