3/7/16

Curtain Call Inspiration Challenge Reminder - Key Lime

Hi and thanks for stopping by today! There is still time to play along with the Curtain Call Inspiration Challenge - Key Lime. Hope you get a little time to create with us! 

The LEAD of this challenge will be invited to be a guest designer in an upcoming challenge!


I loved the colors in the inspiration so much I just had to make another project!


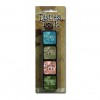
I love having tags in my stash ready to go! I stenciled the background with Distress Ink in Shabby Shutter and layered the tag with a doily. The cupcake is created with  Mini Cupcake Die from Paper Smooches, adding a few clear sequins from Pretty Pink Posh


The sentiment is also from Paper Smooches, the Salutations Stamp Set. This is definitely one of my go to stamp sets. I added a couple of paper roses and stick pins from Maya Road, Leaf Trinket Pins.

Thanks! You can stop by the Curtain Call Inspiration Challenge for all the details!

3/4/16

Maya Road Design Team Blog Hop

Welcome to the Maya Road Design Team Blog Hop! We are excited to share some amazing projects created with some beautiful products from Maya Road! 


·         And what's a Blog Hop without a prize! Maya Road will be giving away a Sweet Nothings Card Kit to a lucky winner. The  winner for the giveaway will be chosen randomly from all the comments on all the blogs in the hop. You have until 9 am EST, Tuesday March 8th to leave comments. The winner will be announced on the Maya Road Design Team Blog   on Thursday March 10th.  Please leave only one comment per blog.

I created a Mini Album for my daughter's upcoming bridal shower. I used an inexpensive frame and two jump rings for the base of the album.

At CHA Maya Road released some wonderful new products including dies. I really love the font used for the With Love Script Die.


I also added a pretty new Tulle Mini Bloom in Bluebird. You can take a look at the Maya Road Winter 2016 Catalog HERE


I used a variety of pattern papers for my pages and a label maker to add the captions. 


On this page I cut a tag with the Gift Tags Die and added the perfect wooden token with a diamond from the Wood Hey Girl Tokens Set


Maya Road Clips are one of my favorite products. I love this cute boat with the heart. I also added a Framed Sayings Transparency Piece in White and a Milk White Felt Flower.  


I love the new, little mason jars. This one is from the Acrylic Mason Jars - Shine Collection. I filled my mason jar with pretty Small Vintage Paper Flowers in Pink and finished off the page with Vintage Rick Rack Crochet Trim in Leaf Green.


Another on of my favorite new Maya Road Products is the Self-Adhesive Rhinestone Trim. I die cut the flags with the second die included in the Gift Tag Die Set


How cute is the "I ♥ You To the Moon and Back" Wood Button! Behind the photo I added a Corrugated Kraft Mail Tag and then the number 8 from the Number Clips Set. 


The sentiment is cut with Fanciful Be Happy Mine Die. I also highlighted the page with a Wood You've Been Framed Embellishment and a Wood Token. 


This die is from the Fanciful Make It Beautiful Die Set and the token is from the Wood Hey Girl Tokens Set.


This wooden token is also from the Wood Hey Girl Tokens Set. At the top I added a Sparkle Sequins Bow Embellishment in Shiny Silver and at the bottom of strip of Pearl Trim in White.


Here's the last page for now! The wedding is com in up in May. I cut a heart and sentiment from glittered card stock with the Fanciful Love Die.

Well that's it for me! It's time to hop on over to the amazing Julia Stainton's blog.

You can stop by the Maya Road Design Team Blog for all the blog hop details.

Melody Rupple (You are here)

3/3/16

It's Release Day at Taylored Expressions - Let's Chat!

It's release day at Taylored Expressions!!  All the new March products are available at the TE web store NOW! 

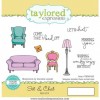
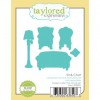
Today I have two cards to share that are created with the new Sit & Chat Stamp Set and coordinating Sit & Chat Dies. This is such a fun set!


For the background I used the Bead Board Embossing Folder to add some fun texture to the wall. For the floor I used Toffee Card Stock, adding a bit shading, and stamped a sentiment from the Sit & Chat Stamp Set. 


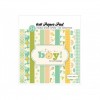
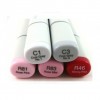
I stamped the chairs and the pillows on paper from the Carta Bella 6x6 Pad - It's A Boy and then cut them out with the Sit & Chat Dies. The legs on the chair and the lamp are colored with Copic Markers.

Here are the products I used to create my first card: 


Here is my second card using the Sit & Chat stamp set and the new Build a Scene - Window Die.


For the background on this card I cut a piece of watercolor paper  and lightly watercolored the background. I cut a thin strip of Sugar Cube Card Stock to add a base board and stamped another sentiment from the stamp set.


The couch and the lamp are colored with Copic Markers. I added a little Kirarina Wink Glitter Pen in Gold Metallic to the lamp. For the pillows and curtain I used the Carta Bella 6x6 Pad - It's A Girl. 

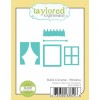
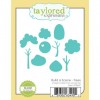
I used the new Build a Scene - Window to die cut the window and the curtain and then add a piece of Clear Plastic between the window and the tree. This tree is created with the Build a Scene - Tree Dies. 
Here are the products I used to create my second card:


Thanks for visiting! If you'd like to see more projects and new product information, please head over to the TE Blog for a complete list of our participating designers!


3/1/16

Curtain Call Inspiration Challenge - Key Lime

Hi Everyone! It is time for a all new Curtain Call Inspiration Challenge - Key Lime. I love the fresh, spring colors for the challenge! 

 I hope you get a chance to play along. The LEAD of this challenge will be invited as a Guest Designer in a future challenge.


Here's my take on the challenge. 


To create the shaker for my card I used the Reverse Confetti Gift Card Holder Tag Confetti  Cuts. The background in the shaker is done with watercolor paper and Distress Ink in Shabby Shutters and Peeled Paint. 


The Happy Sentiment is from the With Love Stamp Set and Birthday is die cut with the Fancy Words Confetti Cuts, both from Reverse Confetti. The sequins are from Pretty Pink Posh

Thanks for stopping by! Hope you get a change to play along!

 Key Lime  Designers

Guest Designers
Amy Rohl, Ink About Me
Michelle Bala, My Passion for Crafting