Hi and thanks for stopping by today. My Favorite Things is kicking off a new challenge this month, Organization For Your Creative Space! Each month there will be a new topic!
Thin, versatile, durable - stencils are all of that and more! If you haven’t amassed a collection of stencils yet, we’re confident that once you give them a try, you’ll become quickly addicted! Whether you use them as a mask for applying color or a texture medium, or run them through your die-cutting machine to add subtle texture, you’ll never run out of creative uses for these supply staples. This month, our team is sharing their storage solutions for stencils.
I have to say that the challenge is perfect timing for me! About six months ago I was working on a scrapbook page where I had planned to add a little bike as an embellishment. I think I looked for that die for an hour and had to just give up! (Of course I found it as soon as I purchased another one.) But that was the day I decided I HAD to get better organized.

My stencils are filed in a standard storage bin from Michaels. I seemed to have collected quite a few of them so I decided to organize them into four categories, Flourishes and Doilies, Flowers, Geometric Designs, and Nature. Nature included things like clouds, sun rays, raindrops etc.

If you take a look at your MFT Stencils you will see the name of the stencil at bottom, centered on the stencil. But I wanted to be able to locate the one I was looking for quickly so I added the name on the left side of the stencil. I used a label maker and 1/4" tape.
I would recommend a label maker to use when taking on a organizational challenge. I have a Brother P-touch that I purchased from Amazon. I keep 1/4" and 1/2" tape on hand.
There are so many different ways to used stencils. I love being able to create my own patterned paper with a stencil, a sponge dauber of some sort, and ink. I also love experimenting with a variety of embossing pastes. I use my stencils a lot on scrapbook pages to add pattern and texture, but not a lot of bulk.

I created this scrapbook page and thought I would share with you some of the steps in my creative process. On this page I decided to to do a canvas background. I love the clean slate you start with and the soft texture canvas adds to a project.

First I decide on my photos and basic layout which helps me decide where I want to start laying down my patterns and textures.

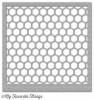
My first layer is Kraft Ink with the Mini Chicken Wire Stencil I use Scotch Matte Finish Removable Tape to help hold my stencil in place.

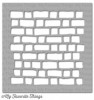
My next layer is a Crackled Texture Paste with the Brick Wall Stencil. I use a palette knife to apply the paste and a old gift card, credit card, or hotel room card to smooth out the paste and keep my layer of paste thin so that I don't waste paste and the paste will dry fast.

All my pastes, paints, and sprays are organized in this cart from Ikea. I love it because I can roll it up to may desk when I am working on that kind of a project and out of sight when it is not in use.

On the top shelf are the gessoes, pastes, glues and two holders that contain my paint brushes and palette knives.

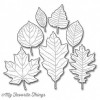
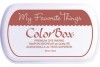
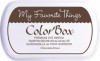
Once the texture paste was dry I sponged on Ink on the brick in Kraft, Chocolate Brown, and just a little Black Licorice. "NAPA" is cut with the Little Letters Die-namics and the leaves with the Falling Leaves Die-namics.

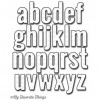
I used the negative of the the Little Lowercase Letters to spell out "in the fall".
Here are the products I used to create my scrapbook page:
 |  |  |  |  | |
 |  | ||||
 |  |  |
So get so stencils out and start creating! Thanks for stopping by!


Sigh ... I have coveted that IKEA cart for a long time -- great to know it's so handy! Your page is gorgeous, Melody -- I adore the use of canvas and the different stencils you used and the fabulous texture you created!
ReplyDeleteStunning Melody. Stunning.
ReplyDeleteGirl this organization series is perfect timing! After moving houses twice and consolidating from a dedicated craft office, I have my work cut out for me. Thanks for sharing your space and ideas with us!
ReplyDeleteGod's blessings,
Sarah :)
I am cracking up at your cart-o-mess. If I told you 3-4 years ago that you would be into this messy stuff, you would have laughed in my face! Now look at you! You are a mixed media rock star!
ReplyDelete