Thanks for stopping by for MFT's September Creative Challenge. This month's challenge is Halloween Happenings.
We’re in the midst of preparing for a frightfully sweet Halloween
season! This time of year presents so many opportunities for crafting -
everything from party invitations and spooky greetings to decor items
and delightfully wicked favors. We’ve challenged our team to up their Halloween game by creating a plethora of seasonal projects.
Stop by the MFT Blog for the list of designers sharing project today.
For the challenge I created two ideas for treat boxes and a fun Tag Halloween Banner.
I used the Home Sweet Home Dies-namic to create the front and back of the house, including the windows, door, and the roof top. Behind the windows and the doors I added a piece of vellum and Banana Split Card Stock. To form the box in the middle that holds the candy I used the Treat Tote Die-namics.
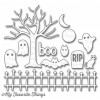
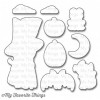
The spooky elements are cut with the Spooky Scene Die-namics. I used the Woodgrain Background Stamp to stamp the background on the house.
Next up is a treat bag put together with the Paper Bag Treat Box Die-namics and Orange Fizz Card Stock. I stamped the background of the bag with the Cheesecloth Background Stamp and Orange Fizz Ink.
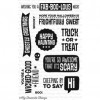
I used the Paper Bag Peek-a-Boos Die-namics to cut the face in the bag. I added a piece of vellum and Banana Split Card Stock behind the face. The ghost is included in the Spooky Scene Die-namics and the sentiment is from the Spooky Sentiments Stamp Set.
My final project is a banner I created using the Pierced Traditional STAX Die-namics and the Traditional Tags STAX Die-namics for the base of each tag. The banner is strung on a thicker twine and hung up with clothespins.
Here's a closer look at each tag. The elements on this tag are cut with Spooky Scene Die-namics and I used corrugated paper and sequins from my stash.
My letters are cut with the High-Rise Alphabet Uppercase Die-namics from Glittered Card Stock. Each letter is adhered to a doily cut with a die in the Mini Doily Circles Die-namics and then a rosette I created by hand.
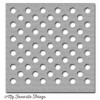
The background on this tag is done with the Large Polka Dots Stencil and Gold Embossing Paste and a little gold glitter sprinkled on the paste.
I used gold glittered card stock and a key from my stash on the tag.
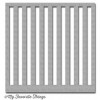
This background here is created with Kraft Card Stock and the Stripes Stencil with Black Embossing Paste.
Here's the tag on the end. The background on this tag is done with the Large Polka Dots Stencil and Gold Embossing Paste on Black Licorice Card Stock. The sentiment is from the Spooky Sentiments Stamp Set. The ghost and fence are cut with dies in the Spooky Scene Die-namics and the clouds with the Flat-Bottom Clouds Die-namics.
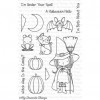
The pumpkins are from the Witch Way Is the Candy? Stamp Set and cut out with the Witch Way Is the Candy? Die-namics. I added some highlighting with Copic Markers.
I shared the Halloween Shadow Box earlier in the month. If you missed the post you can find all the details HERE.
Here are the products I used to create the little house:
Thanks for stopping by!












WOWOWOWOWOWOW~You've been BUSY!! =) LOVING your Projects for today!! =) Such AWESOME Designs!! I LOVE the Colors too!! THANKS for sharing and have a Fabulous Week!! =)
ReplyDeleteSuch beautiful creations Melody.
ReplyDeleteMelody! Holy CROW! These are all incredible! I LOVE your haunted house box! It is as cute as can be with that little cat by the front door! I LOVE your tags and that shadow box as well!
ReplyDeleteMy goodness, these are all fabulous! Thanks for sharing your talent using these fun crafting goodies.
ReplyDeleteWOW Melody, Great projects!
ReplyDeleteFantastic projects! Thank you for the inspiration.
ReplyDeleteoh my word, girl! holy halloween, batman!!!
ReplyDeleteSpooktacular projects Melody! Those little ghosts are adorable!
ReplyDelete