Thanks for stopping by for MFT's August Rewind - Part 2! The MFT Team has another two days of inspiration for you using using newly released products that are available HERE NOW. You can stop by the MFT Blog for the list of all the designers sharing projects today.
Today I am playing with a number of new products to create a Halloween Shadow Box. I have to say I love how the box turned out and excited to add it to my Halloween decorations!
I will be using LOTS of MFT products in this post and will adding links to them at the bottom of the page.
There is one photo of each of my daughters at Halloween in different stages of the lives.
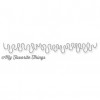
Let's start at the top at the left. I used the Fishtail Flags STAX Die-namics to create my banner and the Little Letters Die-namics to add "Boo". I added the goo at the top with the Dripping Goo Edge Border Die-namics. The pattern is created with the Small Checkerboard Stencil and the flower with the Mini Hybrid Heirloom Rose Die-namics.
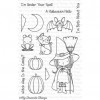
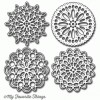
Next is the picture of my daughter Kristen. The a bingo card from my stash. I used the Delicate Doily Die-namcis and the Pumpkins are created with the Witch Way is the Candy? Stamp Set and Die-namics.
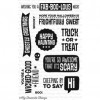
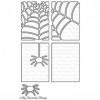
On the right the sentiment is from the Trick or Treat Stamp Set and I used the new Stitchable Dot Circle Die-namics and the Circle STAX Die-namics to cut it out. The spider is a die in the new Centerpieces Spooky Window. The background pattern is created with the Web Stencil and Light Molding Paste.
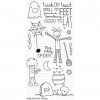
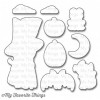
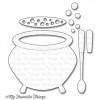
This row starts with a picture of my daughter Kayley. The witches pot is created with Witch's Cauldron Die-namics. I cut it from black chipboard and embossed it with embossing enamel. The buttons are in Sour Apple and I added a coat of Sheer Sparkle Glitter Glaze and a little extra glitter. On the far right I put the scene together with elements in the new Spooky Scene Die-namics. The House if from my stash and the background is stamped with the new Cheesecloth Background Stamp.
Here are the left I created the window with the Centerpieces Spooky Window. I sponged the background. The burlap leaf is cut with the die in the Fall Foliage Die-namics. In the next box used the Star Background Stamp for the background. The rose is cut with the Royal Rose Die-namics, stamped with the Script Background Stamp. The sentiment is from the new Spooky Sentiments Stamp Set.
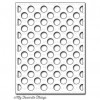
The envelope is created with the You've Got Mail Die-namics, this month's Free with $60 product. I used the new Writing Tablet Background Stamp on the note along with another sentiment in the Spooky Sentiments Stamp Set. The dots in the background are cut with the Polka Dot Cover-Up.
The last picture is my daughter Nicole as Marilyn Monroe. The extra metal accents, enamel dots, and pumpkins for from my stash.












AWESOMEshadow box!!
ReplyDeleteAwesome!
ReplyDeleteHoly wow, Batman! Such a wonderful gift... I always dressed up for Halloween, but the kids didn't know until they came home from T&Ting what I would be!
ReplyDeleteOk, this would take me years to do...if I even finish it! You are some kind of brilliant GF!
ReplyDeleteWhat a super-cool project. I wouldn't even attempt it, but I sure love looking at it. Super job.
ReplyDeleteFabulous project and so many great details. Thanks for sharing.
ReplyDeleteWhat a great job!!! That is so beautiful. How long did it take?
ReplyDeleteAmazing, Melody! I can supply a printer tray & photos if you feel like doing another one :)
ReplyDeleteLove your shadow box,love all the new products you used,so beautiful!
ReplyDeleteWHat an incredible project Melody!! Wow!!
ReplyDeleteWow! Its put together nicely! Nice pics too.
ReplyDeleteSuch a fabulous keepsake Melody to treasure! Your hard work really shines through!
ReplyDeleteMelody, this is AMAZINGLY AMAZING, times like a jillion! Oh my word, girl! LOVE.
ReplyDelete