2/28/14

MFTWSC165 - HAPPY

Yeah! It's Friday. We are getting much needed rain today in San Diego. A good day to spend in my stamp room!! 

Here is my card I made for this week's MFT Sketch Challenge #165


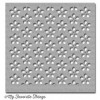
I started by creating the background pattern for the base of my card. I used the Spring Flower Stencil and Light Molding Paste on Pink Lemonade Card Stock . Love the effect! 


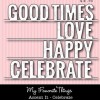
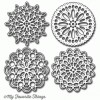
The circle is cut from Spearmint Card Stock with the Pierced Circle STAX Die-namics. Then I added the word "HAPPY" with the Accent It - Celebrate Die-namics and "birthday" with a stamp in the Bitty Banners Stamp Set.

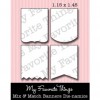
The sweet flower is created with the Pretty Posies Die-namics. One of my favs! I added a button in Lemon Drop. The white flag is cut with the Fishtail Banners STAX Die-namics.


On the inside I stamped a sentiment from the Birthday Greetings Stamp Set and a leftover strip of the Spring Flower Stencil. 


Here are the products I used to create my card:

Thanks for stopping by. But sure to stop by next week for peeks at MFT's March Release!

Photobucket
Pin It

2/25/14

Color Throwdown 281 - Our Little Monkey

Thanks for stopping by for Color Throwdown 281! It's Monika's turn this week to host the challenge! She has chosen this beautiful sunset photo to inspire us this week. 

I hope you get a chance to play along for a chance to be next week's Guest Star Stamper!


I decide to use this week's colors to scrap some photos from the fall that have been waiting to make it into the photo album! 


I started by adding a thin layer of paint to the background of my scrapbook page.


At the top I used the Stargaze Stencil to add the stars. I used Light Molding Paste and when the paint was dry I sponged Lemon Drop Ink on the stars and added a little glitter.

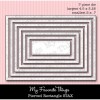
I used the Pierced Circle STAX Die-namics to cut the moon and the Little Letters and Little Lowercase Letters Die-namics to add the word "Our". The sentiment is from the Document It - Expand Your View Stamp Set and cut out with the Ticket Tab Die-namics.


"Little Monkey" is cut with the Little Letters and Little Lowercase Letters Die-namics.


On the right side I added a place for journaling with the Insert It - 3x4 Notepad Die-namics. "October" is cut with the Accent It - Months of the Year Die-namics, and "LOVE" with the Accent It - Celebrate Die-namics. 

You do not have to have the exact colors to play the Color Throwdown challenge,  just use the closest you have.  Use the link service to post your card and please link directly to your card so we can find it easily. And please include a link in your post to the Color Throwdown. If you upload your card to a public forum, please use the keyword CTD281.  Be sure to check out what the other team members have come up with this week!

Barbara Anders 
Nicole Nastali – January Guest Designer

Here are the products I used on my page:

Photobucket
Pin It

2/24/14

MFT's February Creative Challenge - Creative Stenciling Techniques Unmasked

Thanks for stopping by for MFT's February Creative Challenge. This month's challenge is all about Stencils. The design team will be sharing creative tips and techniques for using stencils. There are so many options! 

Be sure to check out the MFT Blog for a list of all the designers who have a project to share with you today. 

I have a couple projects to share with you, a card and a scrapbook book page. 


On my card I used the Spring Flower Stencil to create the background pattern. I use Scotch Removable Tape to hold my stencils in place. Here I taped my stencil to Smooth White Card Stock and stamped VersaMark Ink over the flowers. Then I sprinkled Gold Embossing Powder over the VersaMark, and set with embossing powder and my heat gun.


I used the Insert It - InstaFrame Die-namics to create the frame and the Little Lowercase Letters Die-namics to spell out "hi". The little banner at the top is cut with the Mix & Match Banners Die-namics from Gold Metallic paper.

The flower is cut from vellum with the Mini Hybrid Heirloom Rose Die-namics and I sponged a little gold ink on the edges. The leaves are die cut with the Layered Leaves Die-namics the flower is layered on a doily cut the with the Mini Delicate Doilies Die-namics.


On the inside I stamped a sentiment from Birthday Greetings Stamp Set. 


Next up is my scrapbook page. I used two different stencils on my page using two different techniques. I took a few photos as I put my page together, just straight off my desk, nothing fancy! 

When I start to create a scrapbook page my first step is to choose colors and paper that enhance the photo I am working with, and secondly to decide on my basic layout. 

Inspiration for this layout comes from the sketch challenge at Once Upon a Sketch


I made a few pencil marks where my photo was going. Then taped down the Mini Chicken Wire Stencil and used a sponge dauber and Natural Ink to added the pattern around the page.


Then I used the Brick Stencil  and Liquitex Light Modeling Paste to add the brick pattern and a nice texture to the page. I used a palette knife to spread the paste on the paper. But I like to have a old charge card or gift card around to help spread the paste evenly and help keep the layer of paste thin.


Once the paste was dried I used  Kraft, Chocolate Brown, and Black Ink to add color to the brick like the brick in the photo.


Now let's talk about the embellishments. The sentiment at the top is from the Document It - Expand Your View Stamp Set and cut out with the Rectangle Pierced STAX Die-namics. 

I added burlap behind the photo to create a little more texture to the layout. 


The journaling card is created with the Journal It - For the Record Stamp Set and the Insert It - 3x4 Insert Die-namics. The globe is cut with a die in the  Accent It - World Traveler Die-namics.


Here the suitcase was also cut with the Accent It - World Traveler Die-namics and the clock is created with the Timeless Stamp Set and the coordinating Time Pieces Die-namics. The word "Adventure" is also from the Document It - Expand Your View Stamp Set.The metal clock and enamel dots are from my stash. 

Here are the MFT products I used to create my card:


Here are the products I used on my scrapbook page:


Thanks for stopping by! Hope I have given your some new ideas to use with your stencils!

Photobucket

Pin It