Thanks for stopping by for MFT's February Creative Challenge. This month's challenge is all about Stencils. The design team will be sharing creative tips and techniques for using stencils. There are so many options!
Be sure to check out the MFT Blog for a list of all the designers who have a project to share with you today.
I have a couple projects to share with you, a card and a scrapbook book page.

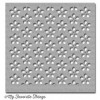
On my card I used the Spring Flower Stencil to create the background pattern. I use Scotch Removable Tape to hold my stencils in place. Here I taped my stencil to Smooth White Card Stock and stamped VersaMark Ink over the flowers. Then I sprinkled Gold Embossing Powder over the VersaMark, and set with embossing powder and my heat gun.

I used the Insert It - InstaFrame Die-namics to create the frame and the Little Lowercase Letters Die-namics to spell out "hi". The little banner at the top is cut with the Mix & Match Banners Die-namics from Gold Metallic paper.
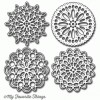
The flower is cut from vellum with the Mini Hybrid Heirloom Rose Die-namics and I sponged a little gold ink on the edges. The leaves are die cut with the Layered Leaves Die-namics the flower is layered on a doily cut the with the Mini Delicate Doilies Die-namics.

On the inside I stamped a sentiment from Birthday Greetings Stamp Set.

Next up is my scrapbook page. I used two different stencils on my page using two different techniques. I took a few photos as I put my page together, just straight off my desk, nothing fancy!
When I start to create a scrapbook page my first step is to choose colors and paper that enhance the photo I am working with, and secondly to decide on my basic layout.
Inspiration for this layout comes from the sketch challenge at Once Upon a Sketch.

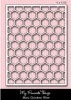
I made a few pencil marks where my photo was going. Then taped down the Mini Chicken Wire Stencil and used a sponge dauber and Natural Ink to added the pattern around the page.

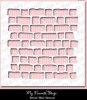
Then I used the Brick Stencil and Liquitex Light Modeling Paste to add the brick pattern and a nice texture to the page. I used a palette knife to spread the paste on the paper. But I like to have a old charge card or gift card around to help spread the paste evenly and help keep the layer of paste thin.


Now let's talk about the embellishments. The sentiment at the top is from the Document It - Expand Your View Stamp Set and cut out with the Rectangle Pierced STAX Die-namics.
I added burlap behind the photo to create a little more texture to the layout.

The journaling card is created with the Journal It - For the Record Stamp Set and the Insert It - 3x4 Insert Die-namics. The globe is cut with a die in the Accent It - World Traveler Die-namics.

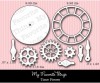
Here the suitcase was also cut with the Accent It - World Traveler Die-namics and the clock is created with the Timeless Stamp Set and the coordinating Time Pieces Die-namics. The word "Adventure" is also from the Document It - Expand Your View Stamp Set.The metal clock and enamel dots are from my stash.
Here are the MFT products I used to create my card:

 |  |  |  | ||
 |  |

Here are the products I used on my scrapbook page:
 |  |  | |||
|  |  |  | ||


Wow Melody!! The gold on your card is gorgeous!! And your layout is incredible!! Amazing work with the stencils!!
ReplyDeleteLove the gold on the card!!
ReplyDeleteOk, I loved the card, especially the flower, WOW!! But then I saw your page and more OMG!!!! You rock!
ReplyDeleteI love all the gold, especially the glittered outline leaves.
ReplyDeleteSo gorgeous. Love the gold accents on the card and all the texture and details on your gorgeous layout.
ReplyDeletegold accents to your card are beautiful, and I really LOVE! how your scrapbook page turned out with all your great textures -you've really got this texture paste and stencil thing down!:)
ReplyDeleteThis is such a great 'man' page...really enjoyed seeing how you constructed it, too....works so well for our sketch at OUAS, too...thanks so much for playing along!!! And if you haven’t already done so, you can link this to our Once Upon A…Sketch Facebook Page for a chance at our special FB prize!
ReplyDeleteBeautiful projects Melody! Love all the shimmery gold accents on your card and your layout is fabulous! Loving all the texture!
ReplyDeleteTravelling is a wonderful thing to be able to do. Lovely photo and I love the vintage feel of this layout. Beautiful accents too. Gorgeous background too. Thanks for playing along with us at OUAS this month.
ReplyDeleteLOVE the card and your scrapbook page is awesome - the depth and texture is fabulous! :)
ReplyDeleteHow did I miss that scrapbook page?! That is fannnnntassstic! Wow! Love it!
ReplyDelete