10/28/15

Hello - Pretty Maya Road Dies

Hi and thanks for stopping by today! I know my blog has been a little quiet. I just returned from a short five day getaway and I am busy working on Taylored Expressions November Release, along with two new releases for companies that I am guest designing for this month that I am pretty excited about! 

But I do have a card to share using the new Maya Road Dies and some pretty Maya Road Embellishments. 


I used the new Hello die, cutting it twice, once from black card stock and once from a light weight chipboard, and then adhered the two layers together. The extra layer just adds a little more dimension.

Behind the sentiment I add a stitched tag, cut with another new die, and a white Framed Sayings Transparency Piece.


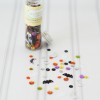
I love having these pretty embellishments in my stash! There is something for everyone, not matter what your style.  Here I add a Polka Dot Button in Licorice Black, a Sunny Day Clip Metal Vintage Trinket, a pretty Felt Rose, two Heart Stick Pins, and some crocheted trim.

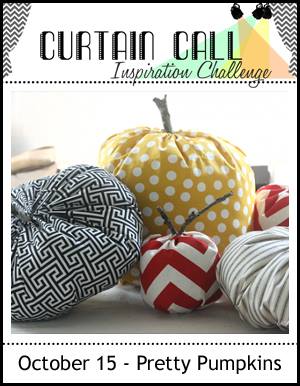
Thanks for stopping by! I will be back on Sunday with the new Curtain Call Inspiration Challenge.

Maya Road Products Used:

Framed Sayings Transparency Pieces - White
Polka Dot Buttons - Licorice Black
Metal Vintage Trinkets - Sunny Day Clips
Felt Roses
Trinket Pins - Vintage Round Pearl & Hot Pink Heart
Crocheted Trim

10/22/15

Curtain Call Inspiration Challenge Reminder - Happy Fall

There is still time to join us in the Pretty Pumpkins Curtain Call Inspiration Challenge !  You have until October 25th at 8:00 AM CDT to be inspired and share your project!


I love having Gift Card Holder ready to go through the Holiday! Here's one I created inspired by the Pretty Pumpkins Challenge. 


I cut the base of the tag with the Die-namics Stitched Traditional Tag STAX. To make the gift card pocket I die cut the tag again and then used the Pretty Pink Posh Pocket Border Die to cut the top. 


The pumpkin is create the Pumpkin Patch Stamp Set from Reverse Confetti and die cut with the coordinating Pumpkin Patch Confetti Cuts. I added a paper doily behind the pumpkin.

Thanks for stopping by! Stop by the Curtain Call Inspiration Challenge for all the details.


10/21/15

Maya Road and Ken Oliver Swap


Hi!! I am up on the Maya Road Design Team Blog . I am sharing a a Christmas Shadow Box made for the Maya Road and Ken Oliver Swap. You can stop by and take a look HERE. Be sure to leave a comment for a chance to win!


Thanks for stopping by!

10/20/15

Wish Birthday Card

I have a birthday card to share today using some Maya Road embellishments and the pretty, new Maya Road dies. I have to say, I love the pretty font!! 


The small tag is cut with the new Tag Die and layered on one of the Framed Sayings Kraft Pieces in White. Behind the tag I placed a black Vintage Doily Transparency Piece. The doilies come in black and white and are one of my go to embellishments. I added the trim at the bottom with the Mini Pom Pom Trim in Cloud White.


The stars and the sentiment are cut with the new Wish Die from glittered card stock. The card is finished off with a Felt Rose, two Leaf Trinket Pins, a Gold Wood Mini Pin, and a Wood Birthday Token.

Thanks for stopping by! Have a great week!

Maya Road Products:

Maya Dies
Framed Sayings Kraft Pieces

10/15/15

Curtain Call Inspiration Challenge - Pretty Pumpkins

It's the 15th of October  and time for a new Curtain Call Inspiration Challenge! This challenge is all about Pretty Pumpkins. 


I hope you get a chance to play along. The LEAD of this challenge will be invited as a Guest Designer in a future challenge!


Here is my take on the Inspiration Photo. 


My new Pumpkin Patch Stamp Set from Reverse Confetti is perfect for the challenge! The pumpkin, leaves, vines are die cut with the coordinating Pumpkin Patch Confetti Cuts. The "thankful" frame is cut from corrugated paper with the Thankful Pretty Panels Confetti Cuts.

I used the October SFYTT as inspiration for the layout of my card.


Behind the frame I added circles with the Circles 'n Scallops Confetti Cuts. The card front is stamped with a background stamp from MFT, Wood Plank Background. I finished off with  a few enamel dots.

Thanks for stopping by! Hope you get a change to play along!


Stop by the Curtain Call Inspiration Challenge: Pretty Pumpkins for the challenge details and to play along with us!


10/14/15

Pretty Ornaments

Today I have a card to share with new products from Taylored Expressions October Release including these beautiful Ornament Overlays Dies. I just love the simple elegance of these dies. 


I started by embossing the background with the new Holly Embossing Folder and then die cut the frame with the Picture Perfect - Vertical Die.


I used the Ornament Accessories Dies to add the details to the ornaments. On the larger ornament I added vellum behind the die cut.  I used a gold glitter card stock on the other two ornaments and finished off with a few gold sequins. The ornaments are hung with Metallic Twine

Thanks for stopping by! Here are the links to products I used to create my card. 


10/12/15

Hello Dear Friend

Hi all! Just popping in with a card I made this weekend that is inspired by the Think Pink Challenge over at the Avery Elle Challenge Blog


The card front is embossed with the Bead Board Embossing Folder from Taylored Expressions. Next I cut a tag, stenciled the pattern on the tag, and matted the tag with gold card stock.


I just love these flowers from the Peonies Stamp Set by Avery Elle. I stamped flowers and the leaves on watercolor paper in Delicata Golden Glitz Ink and embossed with gold embossing powder and then watercolored the images. The flowers and leaves are die cut with the Peonies Elle-ments Dies.

The sentiment is included in the Peonies Stamp Set and stamped on vellum. The pretty sequins are from Pretty Pink Posh.

Have a great week!

10/8/15

Maya Road and Ruby Rock-It Swap

Hi!! I am up on the Maya Road Design Team Blog . I am sharing a couple of cards I made for the Maya Road and Ruby Rock-It Swap. You can stop by and take a look HERE. Be sure to leave a comment for a chance to win!


Thanks for stopping by!

10/6/15

Merry Christmas Ornament Shaker

It was a very busy weekend but I did get a chance to play with a few new products from Paper Smooches and add one more card to my Christmas Card stash and play along the this week's challenge on the Paper Smooches Blog


I started by embossing white card stock for the card front with the Holly Embossing Folder from Taylored Expressions. Then I used the  Large Ornament Die from Paper Smooches to die cut the ornament directly into the card front. I like this die because you can decide how how large you would like the ornament to be.


I placed a piece of acetate behind the ornament and used foam tape to form the shaker. I dropped in sequins from Pretty Pink Posh and adhered the layers together.

I added a top to the ornament with dies in Large Ornament Die and hung the ornament with gold twine. The holly leaves are added with the Holly Die.

Thanks for stopping by!


10/5/15

In Your Heart and in Your Home

Thanks for stopping by! I have on of my favorite cards I made for Taylored Expressions October Release to share today. I just love the Door to Door Die Set and this month Taylor added the Door To Door Winter Decor Die Set to coordinate with the Die Set. 


I started by embossing the card front with the Brick Embossing Folder and highlighting the bricks with Copic Markers. I used the Door to Door Die Set  to create the door and the stairs. The wreath and the the pots for the plants are created with the Door to Door Decor Die Set.


With the new Door To Door Winter Decor Die Set I added snow to the door top and on the stairs, a bow to the wreath,  and die cut the trees with the ornaments on top.

The sentiment is from the new In & Out Christmas Stamp Set.

Have a good week!

10/1/15

Taylored Expressions October Release

 It's release day at Taylored Expressions!!  All the new October products are now available at the TE web store NOW!

Today I have a couple of cards showcasing the new Perfect Picture - Vertical Die. There are two different size dies in this set. My first card uses the larger die.


The larger die in the Perfect Picture - Vertical Die Set is perfect for creating a scene. I use the Build a Scene - Rolling Hills die to cut the snowy hill from white glittered card stock The church is cut with the new Little Bits - Church Die and the trees with the new Build a Scene – Winter Trees Dies.


I used white ink to dust the trees with snow. The background paper is from the new Build a Scene - Christmas 6x6 paper pack. 


On my second card I created a shaker with the smaller die in the Perfect Picture - Vertical Die Set. I stamped a sentiment from the new In & Out Christmas Stamp Set in Gold Delicata Golden Glitz Ink and embossed with gold embossing powder. The In & Out Christmas Stamp Set is one the best holiday sentiment set I have ever owned! The Build a Scene - Christmas Sequins are also new this month.


I added two borders of snowy hills with the Build a Scene - Rolling Hills die and the trees with the new Build a Scene – Winter Trees Dies. The background paper is also from the Build a Scene - Christmas 6x6 paper pack. 


 On my last card I used the Perfect Picture - Vertical Die to create a photo Christmas card, simple to put together and easy to mail. 

Thanks for visiting! If you'd like to see more projects and new product information, please head over to the TE Blog for a complete list of our participating designers!

Here are links to products I used to create my cards: